This is more for my own use. It has been a wicked year for 2018. I have been burdened by a bountiful harvest of yellow squash and cucumbers. I went on a search for yellow squash cookies, and stumbled on another blog that offered what sounds like a very nice recipe. Here is the link. http://www.noordinarymomentsblog.com/2009/07/yellow-squash-cookies.html.
UPDATE! I have tested this recipe. The flavor is more like a biscuit because of the low amount of sugar. I did not stick to the recipe however. Here are my changes.
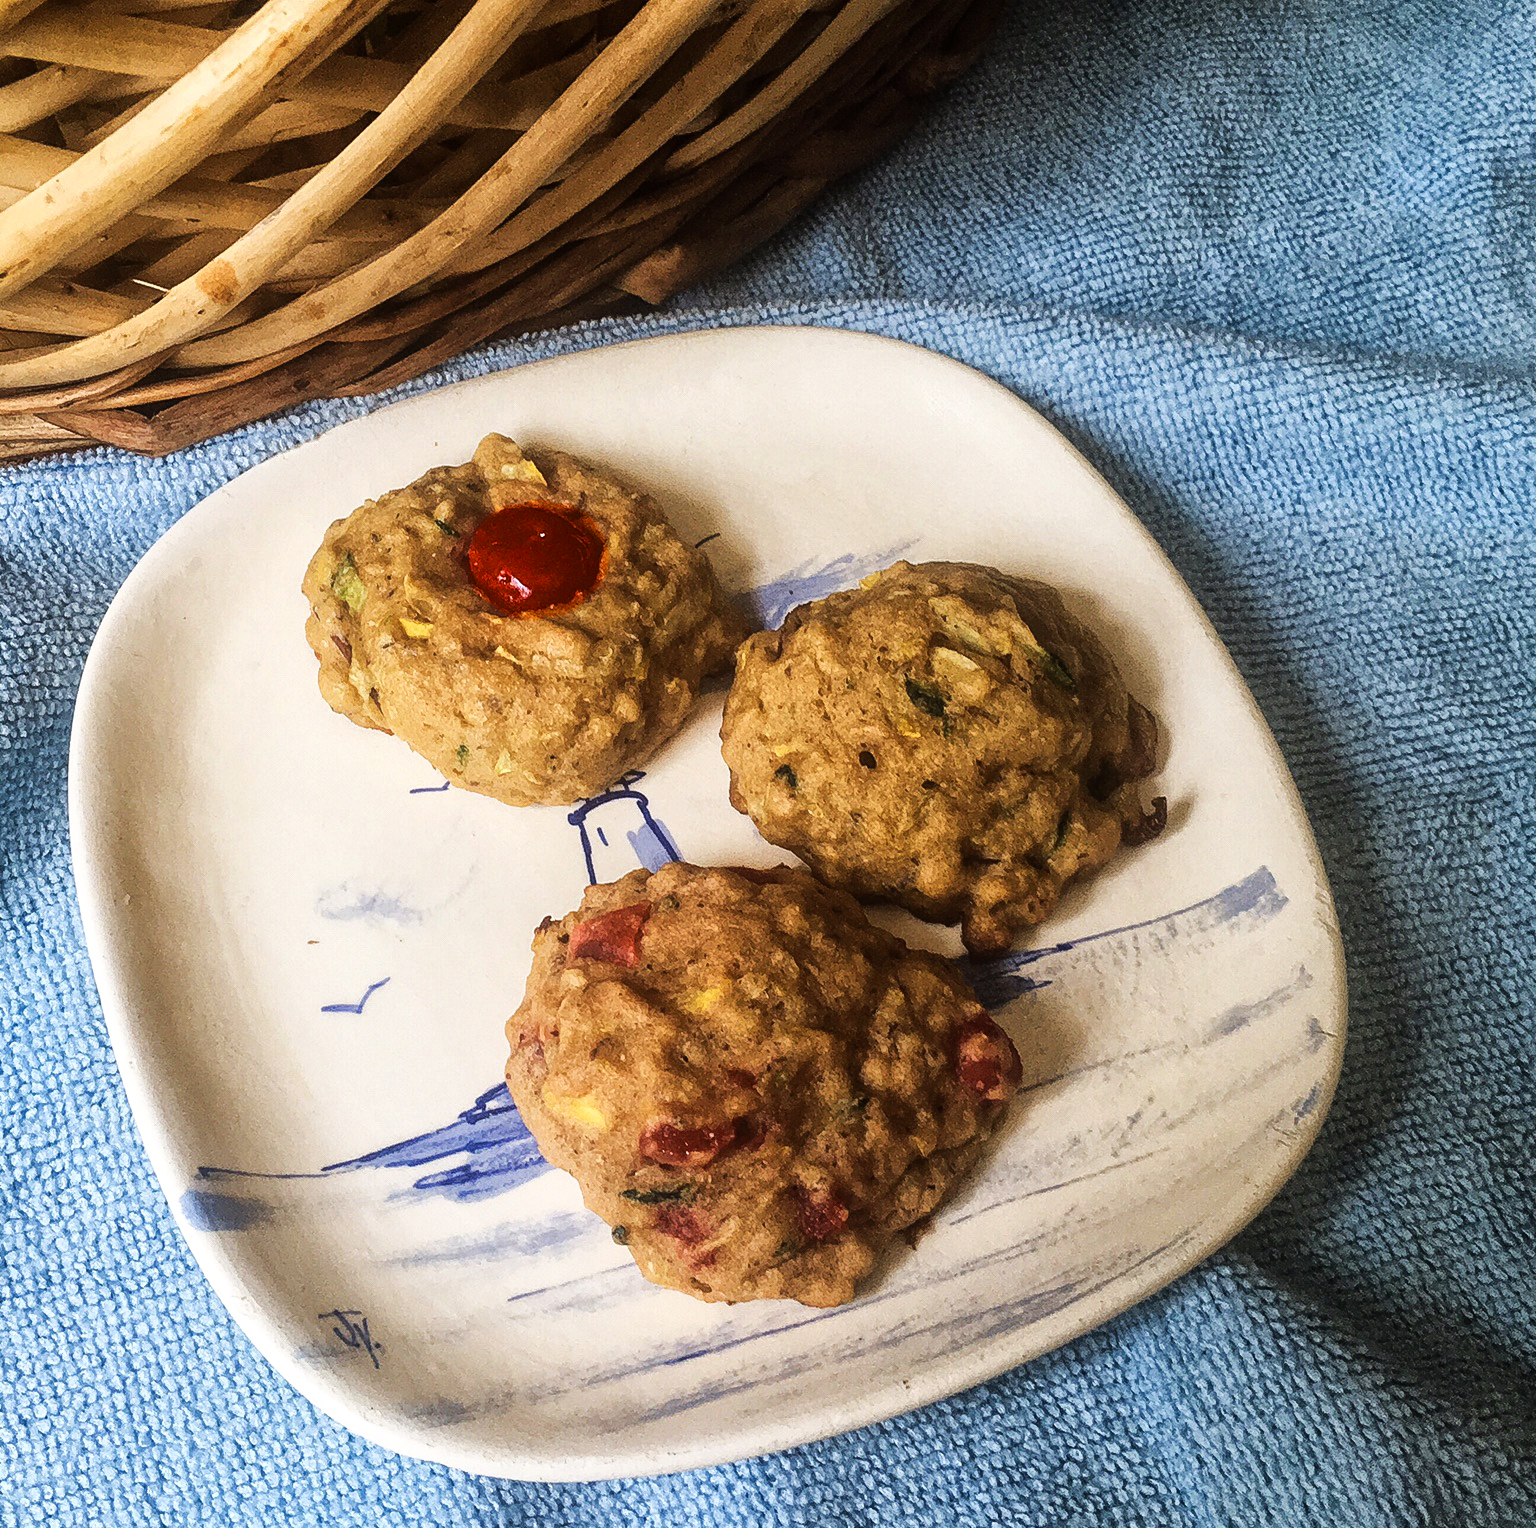
2 cups white whole wheat flour - gives a more dense cookie.
2 tsp almond extract instead of vanilla extract
1 tsp. Cinnamon.
1 3/4 cup shredded yellow summer squash squeezed as dry as you can
1/4 cup zucchini squash again squeezed dry
Chopped maraschino cherries. - I used a whole 8 Oz. Jar.
1/2 to 3/4 cup thick cut sliced almonds - bought at a bulk counter
So why did I opt for cherries? As I tasted the batter, I just thought something was missing. I remembered the old fashioned thumbprint cookies with cherries and went looking in my cabinet for a jar of maraschino cherries.
My first batch on the cookie sheet, I put a 1/2 of a cherry on each cookie. The next batch I made with no cherries. I tasted the cookie with the cherry, noticed the biscuit flavor, but the bite with the cherry was awesome. The cookie with no cherry tastes good if you want a less sweet flavor. Then with the remaining cherries I decided to chop and mix with the remaining batter. They all are good, but the chopped cherries add a nice overall sweetness that was lacking.

There is another that I may also try. Here is the link for that recipe. https://www.thriftyfun.com/tf120391.tip.html
The comments are important to read because I think in order to get a nice cookie that isn’t too mushy, squeezing out excess moisture will probably make a cookie with a better consistency.
But how about all those cucumbers? Well, today I made crackers from the pulp. I juiced the cucumbers, and got 8 cups of juice and 3 cups of pulp from about 13 cucumbers. The juice will be used for powdered drink mixes, such as Country Time Lemonade and Lipton iced tea mix. I kept 2 cups in the fridge and the rest have been frozen in standard 1 pint canning jars.
So here is the link to the cracker recipe. http://www.provincialpaleo.com/homemade-vegetable-thins-crackers-paleo-aip-vegan/
A few changes I made was adding nearly twice as much garlic powder and onion powder, because mine are rather old. I also added about a teaspoon or 2 of dill seed. As I baked the crackers in accordance with the recipe, they were not getting crispy enough, so at the recommended 35 Minute bake time, I took the crackers out of the oven, took them off the cookie sheet, turned them over, shook on some sea salt, then laid them directly on the foil lined oven rack. I baked them an additional 15-20 minutes at 350F rather than 325F as the recipe stated. The finished cracker was somewhat crispy and pretty tasty.
The recipe is for general crispy vegetable crackers. I am certain if they were made from carrots or beets they would be crispy by following the recipe as stated. However, cucumbers and squash are quite a bit more watery, so extra time, or maybe a good squeeze to get out extra moisture changes the technique a little more.
UPDATE

My second attempt came out much better than my first. The crackers are crispy and the dill flavor really comes through. Here is the recipe, so you don't have to follow the link every time, and what I did differently.
Hope some of my past audience will find these links interesting and worth trying. It has been a very long time since I posted any recipes, but maybe I will get back into testing things out, getting creative, and sharing. Thanks for my audience if you check in for this latest blog entry.
UPDATE! I have tested this recipe. The flavor is more like a biscuit because of the low amount of sugar. I did not stick to the recipe however. Here are my changes.
2 cups white whole wheat flour - gives a more dense cookie.
2 tsp almond extract instead of vanilla extract
1 tsp. Cinnamon.
1 3/4 cup shredded yellow summer squash squeezed as dry as you can
1/4 cup zucchini squash again squeezed dry
Chopped maraschino cherries. - I used a whole 8 Oz. Jar.
1/2 to 3/4 cup thick cut sliced almonds - bought at a bulk counter
So why did I opt for cherries? As I tasted the batter, I just thought something was missing. I remembered the old fashioned thumbprint cookies with cherries and went looking in my cabinet for a jar of maraschino cherries.
My first batch on the cookie sheet, I put a 1/2 of a cherry on each cookie. The next batch I made with no cherries. I tasted the cookie with the cherry, noticed the biscuit flavor, but the bite with the cherry was awesome. The cookie with no cherry tastes good if you want a less sweet flavor. Then with the remaining cherries I decided to chop and mix with the remaining batter. They all are good, but the chopped cherries add a nice overall sweetness that was lacking.
The comments are important to read because I think in order to get a nice cookie that isn’t too mushy, squeezing out excess moisture will probably make a cookie with a better consistency.
But how about all those cucumbers? Well, today I made crackers from the pulp. I juiced the cucumbers, and got 8 cups of juice and 3 cups of pulp from about 13 cucumbers. The juice will be used for powdered drink mixes, such as Country Time Lemonade and Lipton iced tea mix. I kept 2 cups in the fridge and the rest have been frozen in standard 1 pint canning jars.
So here is the link to the cracker recipe. http://www.provincialpaleo.com/homemade-vegetable-thins-crackers-paleo-aip-vegan/
A few changes I made was adding nearly twice as much garlic powder and onion powder, because mine are rather old. I also added about a teaspoon or 2 of dill seed. As I baked the crackers in accordance with the recipe, they were not getting crispy enough, so at the recommended 35 Minute bake time, I took the crackers out of the oven, took them off the cookie sheet, turned them over, shook on some sea salt, then laid them directly on the foil lined oven rack. I baked them an additional 15-20 minutes at 350F rather than 325F as the recipe stated. The finished cracker was somewhat crispy and pretty tasty.
The recipe is for general crispy vegetable crackers. I am certain if they were made from carrots or beets they would be crispy by following the recipe as stated. However, cucumbers and squash are quite a bit more watery, so extra time, or maybe a good squeeze to get out extra moisture changes the technique a little more.
UPDATE

Ingredients
- 1 cup green juice pulp, packed slightly
- 120 g or 1 cup arrowroot starch
- 53 g or ¼ cup coconut oil (mine was a soft solid), plus an extra teaspoon for greasing
- ½ teaspoon salt
- ½ teaspoon garlic powder (I used 1 teaspoon)
- ½ teaspoon onion powder (I used 1 teaspoon)
- ½ teaspoon baking soda
- ¼ cup cool filtered water (I used only 1 tablespoon of water)
Instructions
- Place a large sheet of foil on the middle baking rack and preheat the oven to 325F/ 160C
- Place the pulp in a food processor and process until broken up (remove any clumpy bits like apple peel)
- Add in the remaining ingredients except for the water and process until well mixed
- With the processor running, add in the water by the tablespoon until a dough forms
- Turn a half-sheet pan (46 x 33 x 2.5 cm or 18 x 13 x 1") over and grease the surface evenly and lightly with a pastry brush
- Place the dough on the greased surface and cover with a sheet of parchment paper large enough to cover the half-sheet pan
- Roll the dough until it is evenly 3 mm or ⅛" thick (uneven thickness will result in chewy parts)
- Score the sheet of dough with a knife into squares (I scored mine into 24 crackers)
- Place on the foil-lined middle baking rack and bake for 35 minutes, or until fragrant and lightly browned
- Remove from the oven and run a thin spatula between the crackers and the baking sheet to release the sheet of crackers (Note: the oil may run off the half-sheet pan, so remove it carefully without tilting too much! I have an oil-stained recipe notebook now!)
- Transfer to a wire rack and allow to cool completely before snapping into individual crackers
MY CHANGES
I added 1 tablespoon dill seed to the mixture.
Here are my recommendations to get a crispier cracker.
Cucumbers do not like to crisp up very well, so I squeezed as much moisture out of the pulp as I could, then put into food processor.
For the cookie sheet, I did not put a thin layer of oil on it, but a medium one. Have to get the edges as well.
When I rolled out the dough on the sheet, I really rolled thin, like about 1/8 inch. For some reason the cucumber pulp will not dry out unless it is super thin. This meant I had to get a second sheet to roll out the remaining dough.
Don't forget to score the dough before baking.
I placed both sheets in the oven at 325F. Baked for 35 minutes, then removed the crackers and broke them apart. Any crackers that were still moist, I turned over and put back on the cookie sheet, then baked for however long I needed at 350F. I checked the crackers every 5 minutes to see if some had crisped enough, removed them and kept putting the sheets back in. The entire time needed for this second baking could be anywhere from 5 minutes to as long as 30 minutes. Just keep checking for crispness so that they don't overbake.
Hope some of my past audience will find these links interesting and worth trying. It has been a very long time since I posted any recipes, but maybe I will get back into testing things out, getting creative, and sharing. Thanks for my audience if you check in for this latest blog entry.
No comments:
Post a Comment