Marsh Edge Farm Notes

Marsh Edge Farm Notes:
Welcome to my farm blog. I don't have a farm, but I do everything possible to have fresh produce on my table all summer long, as well as can and preserve much of what I grow. I live on the edge of Tolland Marsh and three years ago began calling my home garden Marsh Edge Farm. I created a label to place on all my canned goods, and everything I preserve, from jams to saurkraut end up with one of my simple labels.

I have two gardens, one is a spring garden and the other is my summer garden. From each garden I usually can grow enough to keep me in fresh vegetables for the whole summer, as well as enough to can and freeze to last the winter.

I also grow many of the herbs that go into my dishes. One of my favorite things to do with all these vegetables is create recipes that my family will eat. That is what this blog is mainly about, the recipes I develop or create in my kitchen as I experiment. Hope you enjoy reading my farm blog, and I hope you will try some of my recipes.

Updates for 2014

After a few years of very bad crops, I have left behind the vegetable gardens for awhile. However, I have found that fresh produce is available throughout the summer at the many farmers markets in the area. Here is a list of some of the markets and farms I gather my fresh fruits and vegetables from.

Rockville Farmers Market: Thursdays from 10 to 1 at the courthouse parking lot.

Tolland Farmers Market: Saturdays from 9 to 12 on the green.

Coventry Regional Farmers Market: Sundays from 11 to 2 at the Nathan Hale Homestead on South St.

Wright's Orchard on South River Road in Tolland, CT

Larry Lemeks Berries on Goose Lane in Tolland, CT.

Johnny Appleseeds Peach Orchard on Old Schoolhouse Rd. in Ellington, CT.

Buell Orchards in Eastford, CT.

There are many other farmers markets throughout the state of Connecticut on different days as well as numerous roadside stands. Support your local farmers no matter how small and you will gain in health and well being by eating the freshest of the fresh.

A link to the Connecticut Farmers Markets for 2014
http://www.ct.gov/doag/lib/doag/marketing_files/2014/fm_listing_as_of_07-01-2014.pdf


Sunday, July 27, 2014

Overzealous Zucchini


It is the middle of summer, and those who have planted a few hills of zucchini summer squash are just about up to their ears in this prolific producer.  There are various types of zucchini, including a yellow zucchini which is sweeter than the green, but has the classic zucchini texture.  There can be no doubt it is a zucchini.

There are many ways to prepare zucchini, but a very easy way is grilled.  This recipe was given to me by my friend Nadine.  It works either grilled or baked.  It maintains a crispy crunch, because you don't precook the squash.  Here is the down and dirty easy way to cook some of that very large zucchini that you missed while you were picking, and you think you just can't use it because it is too large.  Not so.  It is absolutely delicious prepared this way. 

1.)  Slice zucchini lengthwise in about 1/3 inch thick slabs.
2.)   Brush with olive oil.
3.)  Sprinkle liberally with garlic powder and smoked paprika.
             (A word about smoked paprika/  It is
             a spice I just was recently introduced to.  It lends a nice barbecue flavor to anything you     
             shake it on. It is available where you find your everyday spices in the grocery
             store.)
4.)  Place on grill on a foil pan with holes poked in.  I use a large round pizza pan with v,ery large
       round holes all over it.  Barbecue for about 5-7 minutes on each side.
5.)  At the very last, put your favorite grated cheese on the zucchini and cook until just melted.  I used
      three cheeses, parmesan, fresh mozzarella, and asiago. 

If  baking, place cheeses on zucchini before baking.  Bake at 400 degrees for about 20 minutes.

-----------------------------------------------------------------------------------------------------------------------

If you missed these recipe, these next two come from Yankee Magazine, summer 2014.  You can sign up for their monthly newsletter which drops seasonal recipes into your email.  It is well worth signing up.


Italian Zucchini Crescent Pie


Yield: 6 to 8 servings
Who can ever have enough recipes for zucchini? This one for Italian Zucchini Crescent Pie is easy, delicious, and highly recommended.

Learn more and see how to make Italian Zucchini Crescent Pie.

Italian Zucchini Crescent Pie
Photo/Art by Aimee Seavey

Ingredients:

  • 3 tablespoons margarine or butter
  • 4 cups thinly sliced zucchini
  • 1 cup chopped onion
  • 1/2 cup chopped fresh parsley or 2 tablespoons dried
  • 1/2 teaspoon salt
  • 1/2 teaspoon pepper
  • 1/4 teaspoon garlic powder
  • 1/4 teaspoon dried basil
  • 1/4 teaspoon dried oregano
  • 2 eggs, beaten
  • 8 ounces mozzarella cheese, shredded (2 cups)
  • 1 can (8 ounces) crescent dinner rolls
  • 2 teaspoons prepared mustard

Instructions:

NOTE. Before you begin, it's best to place the zucchini slices in a colander over the sink or a large bowl. Shake a little salt over the zucchini, then toss a few times in the colander to coat. Allow the zucchini to drain for an hour before proceeding. This will remove excess moisture from the zucchini and give you a better result in the final dish.

Preheat the oven to 375 degrees F. In a large skillet, melt the butter over medium heat. Add the zucchini and onion and saute until the onion is golden, about 10 minutes. Remove from the heat.

Stir in the parsley, salt, pepper, garlic powder, basil, and oregano. Combine the eggs and mozzarella and stir into the zucchini mixture.

Place the crescent roll dough into an ungreased 10-inch pie plate. Press over the bottom and up the sides to form a crust. Spread the crust with the mustard. Pour the vegetable mixture into the crust. Bake for 18 to 20 minutes or until the center is set. If the crust begins to brown before the center is
set, cover with aluminum foil.

Let stand for 10 minutes before serving.


-------------------------------------------------------------------------------------------------------------------------


Lemon Blueberry Zucchini Bread


Ingredients:

  • 4 eggs
  • 2 cups (or less) sugar
  • 1 cup canola oil
  • 2 cups unpeeled, coarsely grated zucchini, drained slightly
  • zest of 1 lemon, grated
  • juice of 1 lemon
  • 3-1/2 cups unbleached flour
  • 1 teaspoon salt
  • 1-1/2 teaspoons baking soda
  • 4 teaspoons baking powder
  • 1 cup (or more) frozen Maine wild blueberries

Instructions:

Preheat the oven to 350 degrees F. Beat the eggs. Add the sugar and beat until well mixed. Add the oil and beat. Add the zucchini, lemon juice, and lemon zest and mix well.

In a separate bowl combine the flour, salt, soda, and baking powder and add to the wet ingredients, mixing well. Gently fold in the blueberries. Pour the batter into 2 greased and floured 5x9-inch loaf pans. Bake approximately 55 minutes or until a knife inserted into the center of one of the loaves comes out clean. Remove from the oven and cool 10 minutes, then remove the loaves to a wire rack to continue cooling.

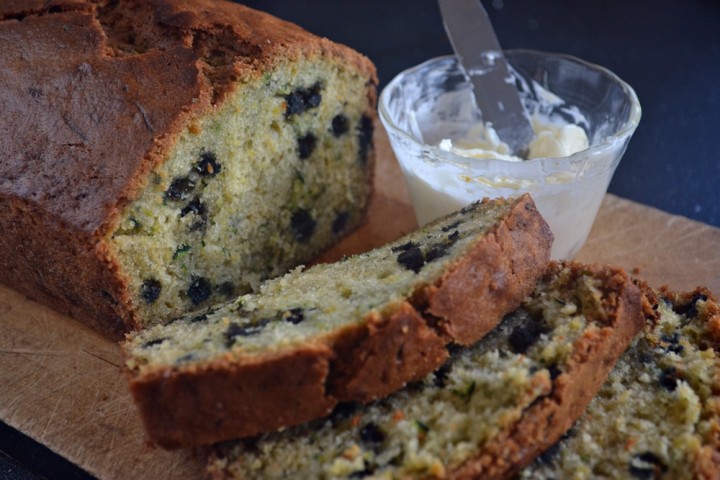
With summer in full swing, it won’t be long before gardens are overflowing and we find ourselves frantically trying to keep up with an overload of delicious in-season fruits and vegetables. This recipe for Lemon Blueberry Zucchini bread was part of a Yankee New England B&B recipe collection, and comes from the 1794 Watchtide…by the Sea! Inn in Searsport, Maine. We love it because it makes terrific use of summer’s bountiful zucchini, wild Maine blueberries, and tart lemon. Why settle for plain zucchini or blueberry bread when you could combine the two, plus a dose of citrus, and get something even more special?
zucchini lemon blueberry bread
Photo/Art by Aimee Seavey
Make the most of summer’s bounty with Lemon Blueberry Zucchini Bread.
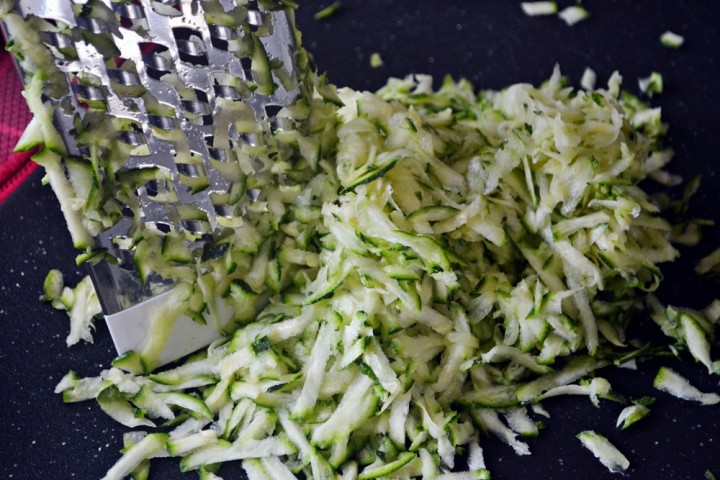
Zucchini is a summer kitchen staple. Among other things, you can slice it up for use in a stir-fry or kabobs, hollow it out and bake it stuffed with tomatoes and cheese, or shred it for use in zucchini fritters or baked goods like muffins, cakes, and quick-breads. When shredding, I like to use my box grater with the largest holes so I’ll get to see plenty of the zucchini in the final product.
shredded zucchini
Photo/Art by Aimee Seavey
Freshly shredded zucchini.
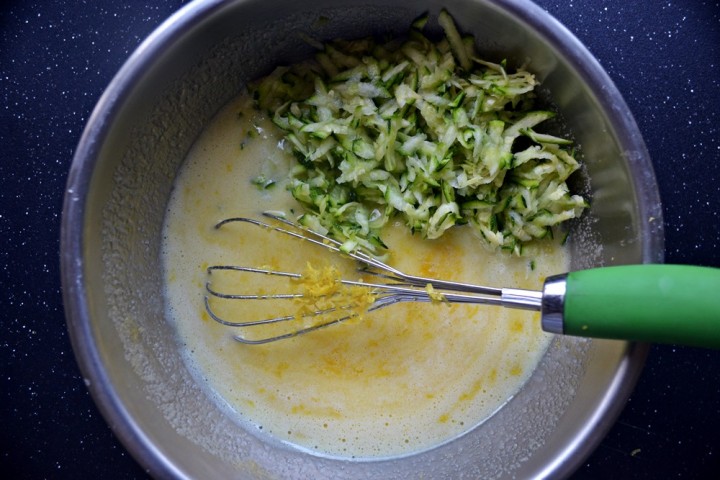
Here, shredded zucchini is whisked together with eggs, sugar, oil, fresh lemon juice, and lemon zest.
zucchini bread batter
Photo/Art by Aimee Seavey
Combining the zucchini and lemon goodness.
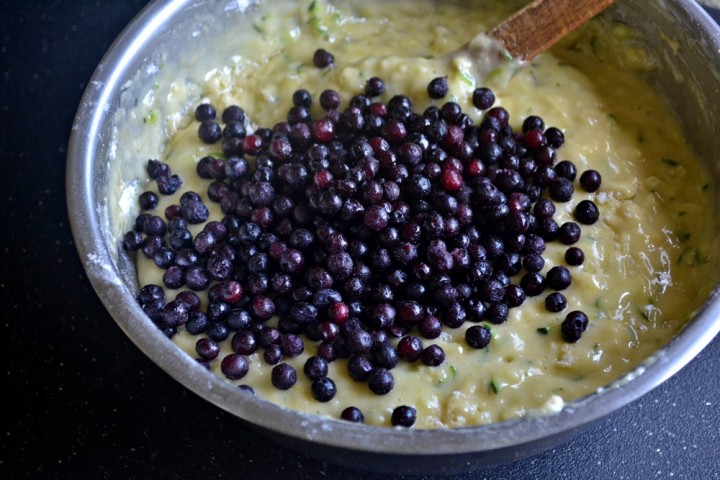
Then, after the dry ingredients are incorporated, a healthy dose of wild Maine blueberries completes the batter. If you can’t get your hands on any fresh blueberries, the frozen variety works fine. Just be sure to add them while they’re still frozen and don’t stir the batter too much. Over-stirring when using frozen blueberries can cause the berries to “bleed,” giving you purple batter, which will visually drown out the beautiful flecks of green and yellow from the zucchini and lemon zest.
blueberry batter
Photo/Art by Aimee Seavey
Time for tiny, wild blueberries from Maine.
Because my loaf pan is a little larger than most, I made one loaf and a half-dozen muffins with my batter. Look at all those beautiful berries and bits of zucchini and lemon!
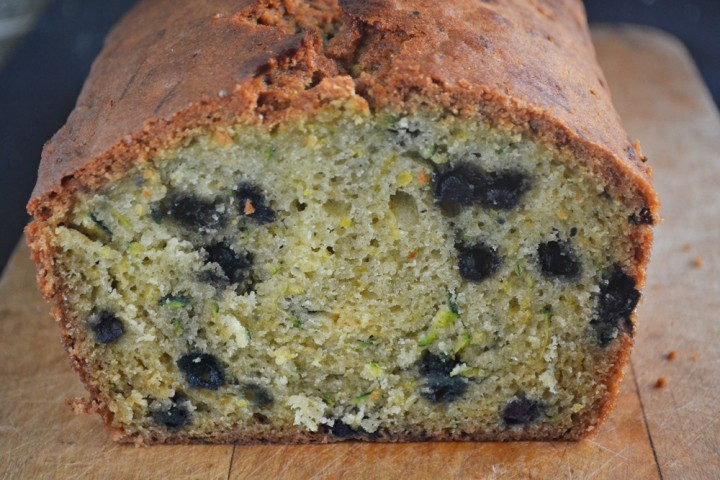
zucchini blueberry lemon bread
Photo/Art by Aimee Seavey
Tart and sweet, this bread’s a winner!
While it’s sweet enough to eat on its own, a warm slice topped with a little butter is summer quick-bread perfection, and since this recipe makes enough to share, you can either give the extra loaf to a friend, or freeze it for later.

Aimee Seavey

Author:

Aimee Seavey

Biography:

Assistant Editor Aimee Seavey is a staff writer for Yankee Magazine and assists in the development and promotion of content for YankeeMagazine.com through blogging and social media outlets.
-----------------------------------------------------------------------------------------------------------------------


That is all for now.  I haven't tried the lemon blueberry zucchini bread yet, but at my next picking I intend to make a few loaves and freeze a few.  It sounds scrumptious.  I'll let you know how it came out.  Happy squashing.

Tuesday, August 14, 2012

Savory Tomato Stuffed Pizza Bread


I have been asked by one of the clients of Coventry Regional Farmers Market to post this recipe, after mentioning it on their Facebook page.  Coventry Regional Farmers Market is the premier farmers market in the state of Connecticut.  It has been rated number one by Yankee Magazine and received a free barn last year.  This year it is in hot pursuit to win a tourism award. 

Although today I created more of a calzone, you can create any shape and size you want for this bread.  It uses ready made pizza crust, which makes this bread relatively quick to make.  This is just one combination.  You can create any kind you like.  It is worth experimenting with various herbs, cheeses, and vegetables.  Got too much eggplant?  Create a filled bread with eggplant, mushrooms, and feta cheese.  You could even add a meat to it, such as lamb, to create a meat roll.  You can try whole wheat pizza crust, or gluten free if you have problems with wheat.  This lends itself to a lot of creativity and can lead to a very exciting session in anybody's kitchen. 

Always at this time of year, in Connecticut at least, we have far too many tomatoes and basil, and become a bit crazed at trying to use all those tomatoes and basil.  So this bread can be made in large amounts, then frozen for future use. 

So far this year I have made a broccoli/ cheese combination and now the tomato.  Next week I think I will be experimenting with swiss chard and eggplant.  I have been pleased with the Rosita eggplant I bought in the spring from Topmost Herb Farm in Coventry, CT.  I bought several items from Carole.  All have done well, including the heirloom tomatoes I purchased from her.  Carole, and her Topmost booth, can be found every week at the Coventry Farmers Market.  Coming up this Sunday, Aug. 19, the market will be highlighting all those heirloom varieties that we have all grown to love here in the east.

Now, let's get to the recipe.

Ingredients 

1 pound of ready made pizza crust (I use mostly Big Y)
2 or 3 Heirloom tomatoes
Wayne's Organic Garlic - 1 or 2 cloves, minced fine
Topmost fresh basil - about 1/3 cup, chopped
32 oz container part skim ricotta cheese
16 oz block of part skim mozzarella cheese, shredded
Olive oil


Directions 

Heat oven to 425 degrees.  Spray baking sheet with cooking spray.  I use Pam olive oil spray. 

Chop tomatoes and put in colander to drain.  Chop fresh basil leaves to make about 1/4 to 1/3 cup.  Mince garlic fine.  Grate the mozzarella cheese.  I usually only need about half of the block, but if I am making a few more than one recipe, I will need it all.  Keep all items in your workspace.


Heat pizza crust dough , in its package, in the microwave for about 20 seconds.  This warms the dough.  If it still seems cold on one side, heat again for another 10 to 20 seconds.  Leave in package.

Open the package and take out about 1/3 of the dough for the calzone bread, and about half if you want to make a longer loaf.  Close package up to keep dough from getting hard. 

With a really small amount of flour on your surface, first squeeze dough between hands to flatten a little, then using both hands begin to work just the edge of the dough to thin out. 

Place on your work surface and this is the hard part, begin to flatten the dough without stretching it or breaking it as you work it.  Now you don't want alot of flour, just enough to make cleaning a little easier later on.  The dough needs to stick to the surface so it won't spring back.  That is why you need to warm it, becausse otherwise the dough will constantly go back to the ball.  I use first a pounding motion from the center, to thin out the dough toward the edge, then I use a pounding along the edge, and a slicing motion.  You will figure it out as you work with the dough.  I like my dough a little thin, because it will raise when baked, and if you have it too thick you will end up with all dough and very little filling. 


Pound with palm from center out                                              Slice edge with side of hand to thin.


You keep on doing the pounding, then the slicing until you have it big enough to fill.  With the bread, your dough should be more rectangular in shape.  With the calzone type, a circle is good.  Always fill it on the widest edge, because you can always stretch the dough across it later.  My circle for the calzone is about 8 inches.


To fill, first put on some of the grated mozzarella cheese.


Then add some minced garlic and some basil.  This is all up to your preference.  I like lots of garlic and basil, but some might like less. 


Add some chopped tomato and a little bit of olive oil.  Just a few drips will do. 


Next put a few spoons of ricotta cheese on top of the tomatoes, then add a little more mozzarella cheese on top of that. 


When making the calzone style, just fold the unfilled half over the filled half and pinch the edges.  When making the bread, you should place your filling down the middle, then fold over each side over the filling.  Always make sure you leave about an inch or so on the top and bottom edge of the dough, and the same for the bread, so when you fold you can still pinch it tight on the long ends. 


Now comes the really tricky part, peeling your finished bread off of the work surface.  I find rocking it back and forth helps, but you still might find that you need to lift it off with a spatula.  This is where you may tear the bread, especially on the bottom.  It takes practice, but you will eventually be able to peel it off successfully.  If you do break the crust, you can always try to add extra dough to cover it up.  I just did one where the entire bottom broke apart, so I flipped it over so the bottom was facing up, I put extra dough over the filling, and when it was baked I ended up with a delicious looking bread that had the filling peeking out of the baked crust.  It does not matter if it breaks, only if you intend to freeze it.  It tastes good even if the loaf does not come out perfectly. 

Bake at 425 for 12 to 15 minutes till crust is nicely browned.
 You should be able to put two loaves on a baking sheet if using half of the crust per loaf, and about 3 if you make the calzone style.  Have fun experimenting, and don't ever give up because it isn't perfect the first time.  I have been trying to work with pizza crust for 8 years, and my brother finally showed me how to get around my problems this year, so now I am good to go, and you will be too.


Thursday, December 1, 2011

From Soup to Dessert

My itching eczema seems to be responding to the dietary changes I am instituting into my daily routine.  It seems that the biggest culprit affecting my condition has been sugar.  I am day 3 without refined sugar, and the itchiness is much reduced, as well as the redness.  The size of the patch also seems to be shrinking.  It may be a combination of the lotions and creams and the diet, but whatever it is it seems to be working. 

Here is my regime for creams.  First thing in the morning I put on Aveeno Eczema Therapy on the patch.  Within about 6 hours, I put my first application of oil and vaseline.  First the baby oil, then about 5 minutes later I put on the vaseline.  At supper I put on more of the Aveeno, and during the night, if I find myself itching the area, I put on another application of oil and vaseline.  The burning I used to get from my prescriptions no longer occurs. 

Now for my diet.  I did not totally go macrobiotic, but I had a leftover soup from Thanksgiving so I used it.  It is called Roasted Butternut Squash Bisque, and I pulled off the recipe from the Two Rivers Country Club.  Here is the recipe, with a few changes that I added.

=================================================================

ROASTED BUTTERNUT SQUASH BISQUE From Two Rivers Country Club Ingredients: 2 butternut squash (approximately 4 pounds total) - halved and seeded 6 tablespoons unsalted butter Kosher salt and fresh ground pepper Fresh ground nutmeg (about ¼ teaspoon) 1 tablespoon extra virgin olive oil ½ teaspoon cinnamon 1 cup finely diced onion 1 cup finely diced leek 1 teaspoon fresh grated ginger or ¼ teaspoon dry ginger 5 cups vegetable or chicken stock ½ cup of heavy cream or ½ cup crème fraiche Instructions: Preheat oven to 375°. Cut each squash in half and discard seeds. Brush the cut sides with 6 tablespoons of the butter. Season with the salt, pepper and nutmeg. Place the squash cut side down in a baking dish and bake until tender, approximately 1 ½ hours. Cool, scoop out the pulp from the skin. Puree the squash in a food processor. Reserve. In a large saucepot, heat the olive oil and add the onions and leeks. Sweat over low heat. Do not brown! Add the puree of the butternut squash, cinnamon,  ginger and stock. Bring to a boil and simmer gently for 15-20 minutes. Whisk in the heavy cream, if desired or ladle in serving bowl and add small dollop of crème fraiche.


             The two changse I made was adding a 3 oz jar of pimento to the soup, and using sea salt.  To keep a primarily macrobiotic recipe, use a homemade vegetable stock instead of chicken stock, as I did.

Link to the recipe


Since this was a leftover, I had some of my Savory Brown Rice left from the previous night.  So I added it to the squash soup, and it was postively magnificent. 

==================================================================

Main Course - Spinach And Goat Cheese
                        Mini Quiche


Ingredients:

2 cloves garlic, minced
1/4 cup chopped mushrooms
1/3 cup chopped leeks
1 10 oz package fresh spinach
1/2 cup non fat organic plain yogurt
3/4 cup skim milk
3 large eggs
1/4 tblsp ground pepper
1 1/2 tsp Dulse granules (available at natural food stores)
1/2 pound raw goat cheese
1/2 tsp Mrs. Dash Garlic & Herb seasoning
large cupcake pan
olive oil

Wash spinach.  Do not drain.  In a large sauce pan on high heat, place raw spinach and stir until spinach starts to wilt.  You may need to do this in steps because you don't want to have too much spinach in the pan at once.  After spinach has wilted, transfer to a colander and let spinach cool.  After the spinach is cooled, squeeze dry and chop coarsely. 

Combine mushrooms, garlic and leeks in the same saute pan with 1 tblsp olive oil.  Add Dulse granules and saute for about 4 minutes.  Remove from heat and add spinach.  Divide the mixture evenly in your six holes in the large cupcake pan.

Take your goat cheese and divide it into six, and place a dolop on each spinach cup in your pan.

In a medium bowl whisk the yogurt, milk, eggs, pepper, and garlic and herb seasoning.  Combine well, then pour in equal amounts over the spinach/cheese mixture in your cupcake cups. 

Bake for about 40-50 minutes at 350 degrees until eggs are set and tart is browned.

These are so good that you will probably want to eat two, so this recipe makes 3 servings.

=================================================================

Flourless And Sugarless Oat and
Peanut Butter Cookies


Ingredients:
1 1/3 cups rolled oats
A handful of  raisins (maybe 2 or 3 tblsp)
A handful of walnuts
3 tblsps raw honey
1/4 cup Polenta Cornmeal
1/4 cup unsweetened, unsalted natural peanut butter
1/2 tsp baking powder
1/4 tsp baking soda
1 egg
2 tblsp organic butter substitute (available at health food stores)

Preheat oven to 350 degrees
Combine all ingredients in a large bowl.  Mix well until batter is blended evenly.
Portion cookies on a cookie sheet lined with parchment paper.  I actually picked up about a tablespoon, and with my hands tried to compress the batter as much as I could, then when it was on the cookie sheet I pressed down to flatten.
Bake cookies for approximatey 12-15 minutes.
Makes about 12 cookies.

=================================================================

My journey into healthier eating continues, though I am currently looking at Entenmann's chocolate covered doughnuts.  It is taking everything in my power to remember what sugar apparently does to my eczema, but so far I have been okay.  The cookies are actually very tasty, and hopefully they will satisfy my sweet craving.  Tonight, though it isn't macrobiotic, I will be making beef stew for the family.  My recipe for stew includes an onion broth that I cook the meat in, then I add carrots and potatoes in the last 20 minutes or so of cooking.  It is simple, hearty, and the family loves it. 


Wednesday, November 30, 2011

New Diet - Have to go macrobiotic. Recipes begin today

Hi to all my readers.  So sorry it has been so long since my last post, but I have not had lots of time to keep the blog.  The produce from my gardens has been canned or frozen, and now I am diving into summer flavored tomatoes that I froze, and wonderful melons, tropical fruits, and apple slices.  I am poking away at my homemade salsa's, but the jams will have to sit, as white sugar is a no no. 

So what exactly is a macrobiotic diet?  Basically it is a diet that relies heavily on whole, unprocessed grains, lots of vegetables and fruits, and very little meat and dairy.  What has generated this new diet?  My skin.  I am now joining the ranks of millions of others who have been "blessed" with eczema.  The condition leaves your skin itchy, red, patchy, sometimes oozing, and can lead to arthritis, infections and leg ulcers.  I am lucky that my single patch is on my ankle, but it is spreading up my leg, and I am concerned that it may start showing up all over my body. 

The thought process is that eczema occurs due to an imbalance in your biology.  In other words, it is not a surface or skin condition, but is a symptom of internal issues.  So the way to treat eczema is to start on the inside with diet.  I have tried everything else, from prescriptions to creams and so far nothing has worked.  We will go to the inside now and see if I can alleviate the itch and pain on my ankle, and prevent it from spreading further.

Okay, so what do I have to go without?  Firstly, no more refined sugar.  That means white, brown, molasses, corn syrup, anything that has to be processed to reach its shoppable state.  What I can use is B grade pure maple syrup, honey, stevia, and things like agave nectar.  I can also sweeten with pineapple juice, as long as it is not processed.  So I will have to start buying pineapples, then use my juicer to extract the juice. 

Next, I have to go without white flour, or any flour that is processed in any way.  All products made with flour, such as pasta products and breads are also off the diet.  So this is a tough one.  It means that I will have to make my own whole grain breads and go without pasta of any kind.  I can eat things like oatmeal, 100% whole grain products, and brown rice, but not white rice.  So are you squirming yet?  Imagine not being able to use sugar or flour any longer.  Do a quick calculation in your head, right now, and check off how much you eat with sugar and flour in it every day, and you will see the task facing me is nearly impossible.

Okay, now the really hard part.  I have to give up coffee and chocolate, and anything with caffeine.  If you haven't screamed yet and run from the room as you think of that, I give you permission to go do that now.

Are you back?  Technically, I also should not eat my home canned fruits or vegetables, and I also should not eat my frozen vegetables, but I am hoping that since I did it myself, the pitfalls which come with commercially canned or frozen vegetables won't be as bad.   I am not giving up my freezer of frozen produce which I grew organically, or purchased from farmers markets.  There is time for that.  I have been dealing with the eczema for over a year now, and if using my home canned or frozen stuff continues the condition, I will start fresh with the right way to do this diet once my freezer is empty.

Right now I am treating the eczema with a combination of baby oil and vaseline, and Aveeno Eczema Cream.   Most have said that baby oil and vaseline are very bad for the condition, but it alleviates some of the itching and burning I get from just walking.  The patch is right where my shoes hit my ankle, and even walking without shoes and socks the motion is causing irritation and inflammation.  It is a difficult area to treat, because the ankle is constantly being used to walk.  The skin never gets a rest. 

I began reducing my intakes of foods for supper last night.  What I ate was a brown rice dish, some salad and half a hamburger with salsa on it.  I drank water.  For breakfast this morning I had an oatmeal creation, which was incredibly tasty.  Here are the rice and oatmeal recipes.

============================================================

Savory Brown Rice
Ingredients:
2 cups water
1 cup brown rice
1 cup Fresh organic leeks, chopped
1 clove garlic, minced
1/2 cup to 1 cup dried fruit mixture (recipe follows)
1 to 2 tablespoons olive oil
1 tablespoon fresh parsley
2 tsps celiac salt

Bring water to boil.  Add brown rice and cover.  Simmer on low heat for about 40 minutes, or until water is absorbed.  Remove from heat.

Add remaining ingredients, mix and serve.

Dried Fruit Mixture

Combine dried cranberries, sliced almonds, sliced pistachio nuts, raisins, and currents.  Spritz the mixture with a little agave nectar for a sweet taste, or a little fresh lemon juice if you want it less sweet.   You can do equal amounts of each, or do more nuts than fruit, but it is for your tastes. 

================================================================


Breakfast Oatmeal
Ingredients for single serving:

1 cup water
1/2 cup whole oats
1/3 cup sliced apples
1/4 cup chopped walnuts
1 tsp cinnamon
2 tsps. maple syurp

Bring water to rolling boil.  Add oats.  Cook over medium heat for 5 minutes, stirring occasionally.  Remove from heat and add remaining ingredients, then cover and let stand for about 3 minutes.  Ready to eat.  This oatmeal is more like a soft granola.  It does the heart and body good, so try it even on the kids and I bet they will eat it too.

=============================================================

Well that's it for today.  I hope that I can keep up my blog now that the colder season is here.  More information will be coming regarding my battle with eczema, as well as tips and tricks that are successful for controlling it.  Stay tuned.  Have a good day.


Saturday, September 17, 2011

Melon Harvest - Lot's of cantaloupe and watermelon

Well, I have had a summer of growing, harvesting, canning and freezing.  It has been awhile since I could find the time to make an entry into my blog.  I have many recipes that I have been doing all summer, and hope I can catch up with them now that most things are done growing for the year.  We are heading into the best time of year for melons of all kinds.  Watermelons, cantaloupe, muskmelons and honeydew melons are all in season right now. 

The prices for melons at farmers markets and grocery stores are currently at the best you will find all year.  It seems such a shame to let all that good pricing go to waste.  But what can you do with melons?  Most people know that they can eat a few of them, but to buy too many seems a waste because their shelf life is not all that long, even when they are in season.  There are things you can do to enjoy the flavor of melons, even in December when the going rate for a cantaloupe can be over $4.00 a piece. 

The question arises, can you freeze melons?  The answer is a resounding yes.  You do lose some of the summer flavor, of course, but a frozen melon ball is nearly as good as a fresh melon ball from a December cantaloupe.  You can also create your own melon freezes now with in season watermelons.  If you happen to have popsicle molds, you can fill them with pureed melon, freeze and eat at your leisure.  Children love popsicles, even if they have been outside sliding in the cold snow.  Melon popsicles are better than regular popsicles because they have a lot more nutrients and a natural sugar.  Don't have popsicle molds?  You can create melon ice cubes instead.  Use ice cube trays to freeze the pureed melon, then package in freezer bags or canning jars.  They are almost like eating an Italian ice.  Add a few flourishes, such as lemon or orange, for a different flavor.  I have even pureed the melons with vanilla yogurt for another great treat.

There is no trick to freezing melons.  Generally all you need to do is cut them into 1/4 inch cubes, or use a melon baller to create melon balls.  This works not only for cantaloupes, but for watermelons and honeydew as well.  Once you have cut your cubes or made your melon balls, place them into glass canning jars or plastic freezer containers.  I like canning jars because for some reason there is rarely any freezer burn.  When you freeze in canning jars, there is crystallization but the flavor is always very fresh when thawed. 

If space is a problem, you can use plastic freezer bags, but you will most likely get freezer burn.  However you can buy a vacuum sealer, and then vacuum seal all your produce.  Where can you get a vacuum sealing system?  A search will bring you to many sites that sell systems.  Here are a few that I found.  One is available at Kohl's.  You can also buy a very inexpensive one at Amazon.  There is also a very nice system available through the official Foodsaver website. 

In my harvesting of cantaloupe in the past, I actually developed one recipe that can be canned.  I had a bumper crop of cantaloupe one year.  I had so many melons, I cried at the thought of wasting all that melon.  Never grow cantaloupes on a hill.  If you do, you will have dozens of cantaloupes to use up.  They love growing on hills.  I happen to have a relatively steep one in my backyard, and when I planted cantaloupe and watermelon on the hill one year, the harvest was endless.  However, I was not going to be beaten by too many melons.  So I went to work trying to develop a way to can my cantaloupe. 

The recipe I came up with was a rich, delectable conserve.  Some might think it too sweet, but I had a wonderful winter of eating this conserve on toast, and using it in baked goods such as coffee cake.  It lasts for a few years if you can't eat it all in one year..  That sometimes happens when you have a bumper crop.  Try this conserve for a very special, expensive tasting treat.  It is the kind of recipe that you will find at the finest bed and breakfasts, that is how special it is. 

___________________________________________________________________________

Spiced Cantaloupe Conserve

Ingredients:

6 lbs cantaloupe, peeled, seeded and cut into
1/2 inch cubes

2 tsp fresh grated lemon peel

1/2 cup lemon juice

8 cups sugar

1/2 cup shredded coconut (I used bagged.  Try it with fresh)

1 cup chopped walnuts

1 cup raisins (optional)

1 tsp. whole allspice

Place cantaloupe cubes in a large bowl.  Toss with the sugar and cover with plastic wrap.  Allow to stand at room temperature for 8-10 hours.  Place in large stainless stockpot with remaining ingredients.  Bring all to a boil and cook until mixture is thickened, stirring constantly (should reduce by 1/2 to 2/3's.) 

Remove from the heat and skim off any foam.  Ladle into sterilized jars, leaving 1/2 inch head space.  Seal and process for 15 minutes.

Yield - 8-10 half pints if cantaloupe is dry
          7-8 half pints if cantaloupe has
                high water content

____________________________________________________________

My next attempt at using cantaloupe will be to try making a cantaloupe marmalade and cantaloupe butter.  If I succeed, the recipes will be posted.  However, for now, I am still in the planning stages as to how I think it will best be handled.  If any of my readers discover a great way to make either, let me know. 

Saturday, August 13, 2011

The Green Has It - Green Tomato Salsa and Sweet Dill Pickles


It has been a very busy couple of weeks.   The vegetables have been coming in dribs and drabs, which means I have to create smaller batches for canning and freezing, but more frequently.  No sooner do I get one thing frozen or canned, when a few days later something else needs to be done.  It is sometimes harder to do so many small batches, but it is the way I have had to do most of my canning this year.

I have been looking at the tomatoes, hoping they would turn red in bulk, but instead I am only getting perhaps 8 or so every few days.  This means that I can't can my salsa in bulk.  This year I have taken to making fresh salsa, but the recipes I have tried to create have not been the tastiest, so until I get a really nice batch of fresh salsa, I won't post my attempts.  Suffice to say that I tried combining things like red tomatoes, cucumbers, onions, chili peppers and basil.  Not the best salsa, but it is now gone. 

As I looked at all the green tomatoes, I decided to try a Mexican tomatillo salsa, substituting green tomatoes for the tomatillos.  This morning I was able to pick about 3 pounds of green tomatoes, and I noticed that many of the tomatoes I didn't pick have gotten just a tad beyond the green stage, so I will continue to cross my fingers that there will be enough ripe ones to make at least one batch of red tomato salsa next week.

A note about green tomatoes.  If you want to try your own green tomato salsa, be sure the green tomatoes you pick are a pale green.  If they are dark green, they have a substance in them that may give you some very bad stomach aches and diarrhea.  The substance disappears as the tomatoes ripen. 

I have also been collecting pickling cucumbers all week.  The bees have been busy pollinating, but the cukes have not come as abundantly as I would like.  However, I finally had enough to make a few quarts of pickles today, along with the salsa. 

The day began at 7 a.m.  First thing I did was take out the Bisquick and a jumbo muffin tin.  From that, I made 6 fresh blueberry muffins.  So we had muffins with coffee for breakfast. 

Then I got out my collection of cucumbers and began scrubbing.  They were still nicely crisp, even though a few of the cukes were just about 5 days old.  They had been in the refrigerator from the time I had picked them.  I do not scrub the cucumbers until they are ready to be used. 

This particular recipe is very good for a change of pace.  It is a cross between a dill pickle and a bread and butter pickle, so it has a unique combination of sweet and sour.  They will taste better if your seasonings are relatively new.  As a rule of thumb, you shouldn't keep your jarred herbs and spices for more than 6 months in your cabinet.  The flavor loses much of its pungency the older the herb or spice is. 

______________________________________________________________________________

                      Sweet Garlic Dills                  


Ingredients:
4 pounds small pickling cucumbers (About 12 - 16)
             I discovered that I was able to fill 5 quart jars with only 5 pounds of cucumbers.  The
             measurements of this recipe is for 2 quarts, but the cucumbers are difficult to gauge
             as to how many you actually need.
4 large cloves garlic, split
4 heads fresh dill or 4 teaspoons dill seeds (I used dill seeds this time)
1/2 tsp. celery seed
2 cups white vinegar
2/3 cup water
1 cup sugar
3 tablespoons pickling salt
1/8 teaspoon turmeric

1.  Wash cucumbers thoroughly, then cut a thin slice from the ends of each cucumber.  Cut cucumbers
      lengthwise into quarters.  I mostly cut them in half, but if the cucumbers were very large, I did
      cut them into quarters. 

2.  Remove hot quart jars from canner.  Place 2 cloves of garlic, 2 head of fresh dill or 2 tsps. dill
     seeds and 1/4 tsp celery seeds into each jar.  Pack in your cucumbers.  You may have to use
     different lengths of cucumbers to fill the jar.  Tuck as many cucumbers as you can in each jar.

3.  Meanwhile, combine vinegar, water, sugar, salt and turmeric in a saucepan and bring to a boil.   
     Pour boiling vinegar mixture over cucumbers to within 1/2 inch of rim (head space.)  Process for
     15 minutes for quarts. 

How to process.  Clean jars, then place in large canner or stockpot.  Fill pot with water about 1 inch above the jar rim.  Heat and let boil while you prepare your recipe.  5 minutes before you are going to fill jars, place your lids and caps in the boiling water.  Take out each jar, dumping a small portion of the water back into the pot, but the bulk of the water you want to dump into the sink.  I use tongs to remove my jars.  Then when you have all your jars filled, place back into canner, and bring water back to boil.  When it is boiling rapidly, put cover on pot and begin timing.  15 minutes later you will remove the jars and place on a rack to cool. 

_______________________________________________________________________________

Now that we have the pickles under our belt, it is time to start the green tomato salsa.  This salsa I have made in the past and it is very tasty.  The first time I made it I combined green tomatoes and tomatillos, because I didn't have enough tomatillos.  That was okay, but I wasn't thrilled with the combination of tomatoes and tomatillos. 

The next time I made it I just used tomatillos, and instead of green chili peppers I used a wonderful chili pepper called bulgarian carrot.  This is a type of thai pepper.  The salsa was awesome.  It has
very little spice when you first eat it, but when you swallow, then you get a burn.  This time the salsa has been made only with green tomatoes.  Try it if you have lots of green tomatoes.  It will be a little different then using tomatillos, but the flavor is still quite good.

_______________________________________________________________________________


Green Tomato Mexican Salsa
Makes 2 cups.  Increase accordingly when making larger batch

Ingredients:

1/2 pound green tomatoes (pale green)
2 hot green chili peppers, seeded and chopped.  (I used a combination of bulgarian carrot chilis,
                         red chili peppers, and green chilis)
2 cloves garlic, minced
1/2 cup chopped sweet red pepper
1/2 cup chopped onion
1/2 cup chopped carrots
1/4 cup each apple juice and cider vinegar
3/4 tsp pickling salt
1/2 tsp each cumin and dried oregano.
1 tblsp sugar
1.  Wash tomatoes and coarsely chop in a food processor or by hand.  Transfer to a medium stainless
      steel or enamel saucepan.  Add chile's, garlic, red pepper, onion, carrot, apple juice, vinegar, salt
      cumin and oregano.  Bring to a boil over high heat; reduce heat, cover and boil gently for
      10 minutes.
2.  Stir in sugar; return to boil and boil gently, uncovered, for 20 minutes or untill mixture is
     thickened.  Remove from heat.

3.)  Remove hot jars from canner and ladle salsa into jars to withing 1/4 inch of rim.  Process 20
       minutes for half pint and pint jars.


______________________________________________________________________________


Wednesday, July 27, 2011

Bisquick Spinach Bread - With A Few Changes

We all had a hankering for a nice bread recipe.  Cooler temperatures yesterday, and the stores bringing out their fall merchandise must have set us in a warm, fuzzy mood.  The kitchen is usually scented with baking vegetable, fruit and bread machine bread beginning in mid August, when the apples begin to ripen.  Some of my favorites include zucchini bread, cottage cheese dill bread, apple bread, and tomato-basil bread. 

Since it is still considered mid-summer despite the temperatures barely making 75 yesterday, I didn't want to worry too much about lots of work.  I looked through my bread books, went online, and couldn't find anything that seemed to be relatively quick.  Then I remembered a small pamplet style cookbook put out by Bisquick many years ago.  I went rifling through all my cookbooks and on the third look I finally found it. 

As I scanned the pages, it dropped open to a page with a recipe called Spinach-Cheese Bread.  I have made this many times before, and always thought it a bit salty, but my family always loved this bread.  So I knew the one thing I would be changing right off is instead of spinach I would be using swiss chard.  The chard has slowed down a lot in its growth compared to a few weeks ago, but there was definitely enough to get the amount I needed for the recipe. 

Some of the equipment I would recommend to make it easier to make the bread is a food processor.  It isn't necessary because the chard can be first cut into ribbons, then hand chopped, but the food processor does make the task a bit quicker. 

This particular bread is a wonderful summer bread if you follow the directions as Bisquick wrote them.  The bread doesn't take much to make and it doesn't keep the kitchen super hot for long periods of time.  First I will provide the Bisquick recipe for the cowards out there (only kidding.)  No processor required, and because you are playing with frozen vegetables, it is great to work with on a hot summer day. 

My one problem with the Bisquick recipe is that it does seem too salty.  I am salt sensitive and find the use of processed or canned products make the flavor too drying for my tastes.  However, when I bake this for the men in my life and the children, they all think it is awesome, and it gets eaten quite quickly, so it definitely will be a winner with any family. 

_________________________________________________________________________

Spinach-Cheese Bread by Bisquick

3 cups Bisquick baking mix
1/4 cup vegetable oil
1 tablespoon caraway seed
3 eggs
1 can (11 ounces) condensed Cheddar cheese soup
1 package (10 ounces) frozen chopped spinach, thawed and squeezed dry

Heat oven to 350 degrees.

Grease loaf pan, 9 x 5 x 3 inches

Mix all ingredients except spinach until well blended.  Beat 1 minute; stir in spinach until well blended.  Pour into pan.

Bake until wooden pick inserted in center comes out clean, 55 to 65 minutes.  Cool 20 minutes; remove from pan.

High altitude directions (3500 to 6500 feet)  Heat oven to 375 degrees.  Stir 1/4 cup all purpose flour into baking mix.  Increase eggs to 4.  Decrease oil to 2 tblsp.  Bake 50 to 55 minutes.

____________________________________________________________________________

That is the quick and easy way to make this bread.  Since I had a problem with the flavor of the bread using the cheddar soup, I had to think of a way to get the soup without using the soup.  I decided on a nice cheddar white sauce mixed in instead of the soup.  Here is my more labor intensive bread, using fresh swiss chard instead of frozen spinach.  The time involved in making it my way is about 3 1/2 hours, which may be a bit much for one loaf of bread, but as I make it more often I will get quicker at it.  Of course, I also missed my original intention of finding a quick recipe that didn't take too much work.  But the work was well worth the result.

____________________________________________________________________________

Savory Swiss Chard-Cheese Bread

Ingredients:
3 cups Heart Smart Bisquick baking mix
1 tablespoon olive oil
1 tablespoon dill seed
2 teaspoons onion powder
1 cup cheddar white sauce (recipe below)
10 ounces fresh chopped swiss chard, stems removed (about 2 cups)
1/4 to 1/3 cup feta cheese (your preference.  I did not measure, I just grabbed three handfuls and mixed in)

Preheat oven to 350 degrees.  Grease a 9 x 5 x 3 inch bread pan. 

Swiss chard prep:  Cut away stems from chard.  I ususally cut about 1/2 inch above where stem attaches to leaf.  Stems can be kept for other recipes if you wish.  After removing leaf, using a scale measure about 10 ozs.    Once measured
wash leaves in a bowl of water.  Continue dumping and filling bowl with fresh water until you no longer see any grit in water.  Squeeze leaves to remove all excess water, then place in small batches in food processor and chop the leaves.  If you don't have a processor, then cut leaves into ribbons, then chop them.  This is probably the most lengthy part of the whole recipe.                                                                   
Once again measure the chopped leaves on a scale to get about 10 ozs.  Set aside. 

To make the cheese white sauce, grate 1 cup of cheddar cheese.  Set aside. 
Scald one cup of milk (heat just to before boil.  I use a microwave, and heat about 2 minutes.)  Set aside.

Place two tablespoons butter or margerine in stainless saucepan and melt on medium low.  Add two tablespoons unbleached flour, stirring to blend.  Always use a wooden spoon when making white sauce.  Do not cook too long or flour will burn.  The milk and flour will create a paste.  Slowly add scalded milk, stirring constantly.  Add some salt and pepper..


Continue stirring on medium low for about 10 or 15 minutes as sauce begins to thicken. You will feel the milk mixture get thicker as you stir. Once mixture is thickened to about the consistancy of a medium gravy, remove from heat. Stir in cheese. Continue stirring until smooth. If you have to place back on burner to melt, make sure burner is off. Set aside off of stove to cool.

As your cheese sauce cools, mix all other ingredients except the chard.  Beat for about a minute.  Add cheese sauce when it is just lukewarm.  Mix.  Add chard.  This is where your preference comes in.  When I measured the 10 ozs, as I was putting it into the bread mix, it seemed to be too much so I did not use all the chard.  I also did not measure how much I used, so I would say anywhere from 1 1/2 to 2 cups. 

Place bread dough into bread pan, level it, and then bake for about 55 to 65 minutes, until long toothpick inserted comes out clean. 

_____________________________________________________________________________

The bread was incredibly well textured, though it did come out a little high.  Perhaps reducing the eggs to 2 might decrease the height of the bread, but I did not mind that it was so high.  The first taste of this bread, and I knew I had finally done something right.  It is delicious, and the time spent making it just disappears as you take a second piece and then a third.  Love this bread.  It is definitely a keeper.