Marsh Edge Farm Notes

Marsh Edge Farm Notes:
Welcome to my farm blog. I don't have a farm, but I do everything possible to have fresh produce on my table all summer long, as well as can and preserve much of what I grow. I live on the edge of Tolland Marsh and three years ago began calling my home garden Marsh Edge Farm. I created a label to place on all my canned goods, and everything I preserve, from jams to saurkraut end up with one of my simple labels.

I have two gardens, one is a spring garden and the other is my summer garden. From each garden I usually can grow enough to keep me in fresh vegetables for the whole summer, as well as enough to can and freeze to last the winter.

I also grow many of the herbs that go into my dishes. One of my favorite things to do with all these vegetables is create recipes that my family will eat. That is what this blog is mainly about, the recipes I develop or create in my kitchen as I experiment. Hope you enjoy reading my farm blog, and I hope you will try some of my recipes.

Updates for 2014

After a few years of very bad crops, I have left behind the vegetable gardens for awhile. However, I have found that fresh produce is available throughout the summer at the many farmers markets in the area. Here is a list of some of the markets and farms I gather my fresh fruits and vegetables from.

Rockville Farmers Market: Thursdays from 10 to 1 at the courthouse parking lot.

Tolland Farmers Market: Saturdays from 9 to 12 on the green.

Coventry Regional Farmers Market: Sundays from 11 to 2 at the Nathan Hale Homestead on South St.

Wright's Orchard on South River Road in Tolland, CT

Larry Lemeks Berries on Goose Lane in Tolland, CT.

Johnny Appleseeds Peach Orchard on Old Schoolhouse Rd. in Ellington, CT.

Buell Orchards in Eastford, CT.

There are many other farmers markets throughout the state of Connecticut on different days as well as numerous roadside stands. Support your local farmers no matter how small and you will gain in health and well being by eating the freshest of the fresh.

A link to the Connecticut Farmers Markets for 2014
http://www.ct.gov/doag/lib/doag/marketing_files/2014/fm_listing_as_of_07-01-2014.pdf


Saturday, August 9, 2014

Peach Nectar - Using All The Peach

The local peach orchard in Ellington, CT. will finally open at Old Schoolhouse Rd. on August 10. 2014.  Johnny Appleseeds will be open on the hill from 9 to 5.  To check for picking conditions call 860-875-1000.

So, I will be joining my cookbook group on Monday night at the Tolland Public Library, and our task for August is to test out some beverage recipes and bring our opinion on our experiment.  My choice came from a cookbook I bought last year from Taste of Home.  The recipe book, titled Smoothies and Blender Drinks has dozens of cooling recipes for hot summer days.

I decided to choose one recipe called Peach Navel, the non alcoholic version.  One of the ingredients for the recipe calls for peach nectar, which is available in grocery stores, but I decided I wanted to make my own.  So I took myself over to Johnny Appleseeds fruit and vegetable stand on Rt. 83 in Ellington.  I was able to procure a great deal.

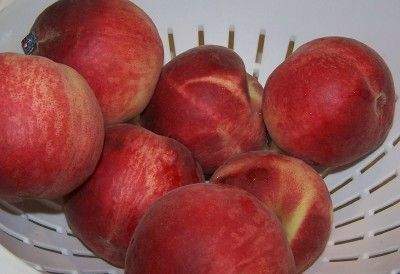
Choosing the right peaches for nectar comes down to softness and fragrance.  You need softer peaches that have got a strong peach scent to make a really good nectar.  Most stands will not sell these softer peaches, but as a consumer, if you ask, they usually will give you a really good price.  They need to be used usually within 24 hours.  Any longer, and they begin to get overripe.

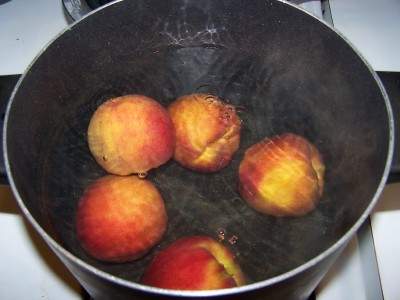
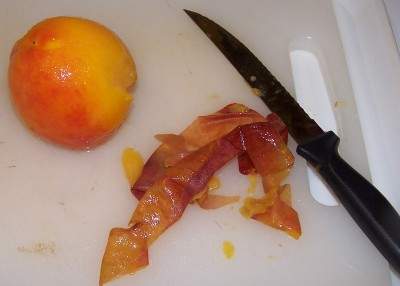
Peach nectar is made from the first extraction of your peaches.  Here is the technique, gathered from EHow.com.  I did not use the boiling method they recommend.  My peaches had very loose skins already, so I simply had to peel them off with my fingers.  I occasionally had to use a potato peeler to get some of the peels, but generally the task took less time then waiting for the pot of water to boil.


PEACH NECTAR


Instructions
    • 1
Select peaches that are somewhat soft to the touch and have a fragrant smell. This indicates ripeness. Very firm or hard peaches will not be ripe and will not provide the sweetness needed for a good nectar. Green, or unripe peaches do not process properly in the blender, and produce a bitter tasting nectar.
    • 2
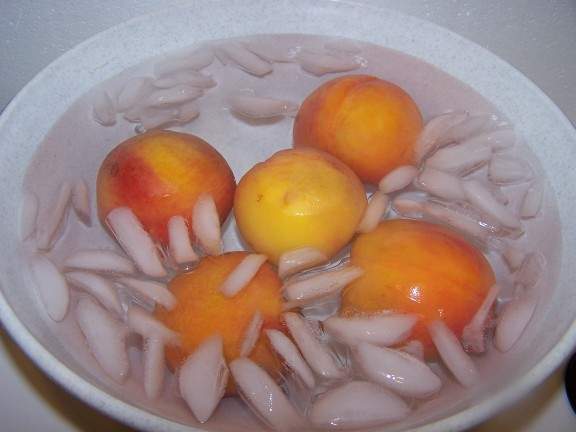
Boil enough water in a stock pot or sauce pan to be able to submerge the peaches. Dip each peach into the boiling water until the skin begins to loosen. Remove from the boiling water and place in ice cold water to stop the cooking process. Peel the peaches, remove the pit and cut into slices.
    • 3
Combine 2 cups sliced peaches and 1 cup water in a blender. Liquefy until smooth.
    • 4
Strain the liquefied peaches through a sieve. Store the nectar in a sealed jar or bottle in the refrigerator until ready to use

This nectar will end up being somewhat thicker than what you would buy.  Before you go crazy, save the sieved pulp of the peach in a separate bowl, and also save your peels.  Save your peach pits as well, because I will give you recipes to use these scrapings so you waste absolutely nothing of your investment.  
 
Now, here is the recipe for your Peach Navel.


How to Make Fresh Peach Nectar


How to Make Fresh Peach Nectar thumbnail
Make your own peach nectar.
Of all the summer fruits, peaches are perhaps the most delectable. So sweet, so juicy, they almost seem decadent. It isn't surprising hundreds of recipes have been developed that spotlight their unique flavor. On hot days, a glass of peach iced tea is the perfect thirst quencher; peach Bellinis are the quintessential Italian summer cocktail; peach brandy is a time honored tradition. Peach nectar is what gives these drinks their signature summertime flavor. While canned nectar is acceptable in many recipes, homemade peach nectar is the best way to get that true, fresh taste. The best peach nectar begins with ripe, fresh peaches.


Things You'll Need


  • Fresh, ripe peaches
  • Stock pot
  • Water

Instructions

    • 1
      Select peaches that are somewhat soft to the touch and have a fragrant smell. This indicates ripeness. Very firm or hard peaches will not be ripe and will not provide the sweetness needed for a good nectar. Green, or unripe peaches do not process properly in the blender, and produce a bitter tasting nectar.
    • 2
      Boil enough water in a stock pot or sauce pan to be able to submerge the peaches. Dip each peach into the boiling water until the skin begins to loosen. Remove from the boiling water and place in ice cold water to stop the cooking process. Peel the peaches, remove the pit and cut into slices.
    • 3
      Combine 2 cups sliced peaches and 1 cup water in a blender. Liquefy until smooth.
    • 4
      Strain the liquefied peaches through a sieve. Store the nectar in a sealed jar or bottle in the refrigerator until ready to use.


Read more : http://www.ehow.com/how_5287254_make-fresh-peach-nectar.html

Instructions


    • 1
      Select peaches that are somewhat soft to the touch and have a fragrant smell. This indicates ripeness. Very firm or hard peaches will not be ripe and will not provide the sweetness needed for a good nectar. Green, or unripe peaches do not process properly in the blender, and produce a bitter tasting nectar.
    • 2
      Boil enough water in a stock pot or sauce pan to be able to submerge the peaches. Dip each peach into the boiling water until the skin begins to loosen. Remove from the boiling water and place in ice cold water to stop the cooking process. Peel the peaches, remove the pit and cut into slices.
    • 3
      Combine 2 cups sliced peaches and 1 cup water in a blender. Liquefy until smooth.
    • 4
      Strain the liquefied peaches through a sieve. Store the nectar in a sealed jar or bottle in the refrigerator until ready to use


Read more : http://www.ehow.com/how_5287254_make-fresh-peach-nectar.html


How to Make Fresh Peach Nectar


How to Make Fresh Peach Nectar thumbnail
Make your own peach nectar.
Of all the summer fruits, peaches are perhaps the most delectable. So sweet, so juicy, they almost seem decadent. It isn't surprising hundreds of recipes have been developed that spotlight their unique flavor. On hot days, a glass of peach iced tea is the perfect thirst quencher; peach Bellinis are the quintessential Italian summer cocktail; peach brandy is a time honored tradition. Peach nectar is what gives these drinks their signature summertime flavor. While canned nectar is acceptable in many recipes, homemade peach nectar is the best way to get that true, fresh taste. The best peach nectar begins with ripe, fresh peaches.


Things You'll Need


  • Fresh, ripe peaches
  • Stock pot
  • Water

Instructions

    • 1
      Select peaches that are somewhat soft to the touch and have a fragrant smell. This indicates ripeness. Very firm or hard peaches will not be ripe and will not provide the sweetness needed for a good nectar. Green, or unripe peaches do not process properly in the blender, and produce a bitter tasting nectar.
    • 2
      Boil enough water in a stock pot or sauce pan to be able to submerge the peaches. Dip each peach into the boiling water until the skin begins to loosen. Remove from the boiling water and place in ice cold water to stop the cooking process. Peel the peaches, remove the pit and cut into slices.
    • 3
      Combine 2 cups sliced peaches and 1 cup water in a blender. Liquefy until smooth.
    • 4
      Strain the liquefied peaches through a sieve. Store the nectar in a sealed jar or bottle in the refrigerator until ready to use.


Read more : http://www.ehow.com/how_5287254_make-fresh-peach-nectar.html


PEACHY NAVEL

2/3 cup orange juice
1/2 cup peach nectar
1 tblsp. thawed lemonade concentrate
1/3 cup club soda

Garnish:
Orange slice and twist of peel.

In a highball glass, combine the orange juice, peach nectar and lemonade concentrate.  Stir in club soda.  Garnish as desire.
note:  You may add 2 ounces vodka  for an alcoholic version.

I made 4 cups of nectar from about 18 peaches.  I had 4 peeled peaches left that I didn't use.  So on my counter I had a bowl of peelings, about a cup of pulp, and 18 peach pits.   I wasn't done yet, so wondered how I could use up the pulp and the 4 peeled peaches.

I covered the peels and pits and set them aside.  I would look at them later.  For now, I hated to let that thick peach pulp go to waste.  I wondered if I could do a quick peach butter.  So here is what I did.
                                                                                                        

LEFTOVER CHUNKY PULP PEACH BUTTER

Ingredients:

1 cup peach pulp
1 cup sugar
4 peeled and chunked peaches

Directions:
 
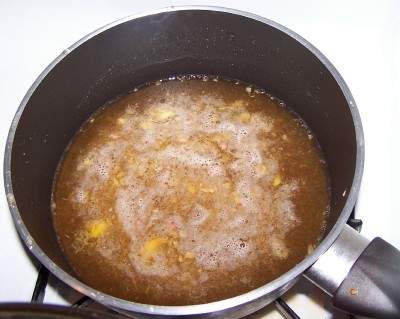
Mix pulp with sugar.  Bring to boil over medium high heat in a stainless pot.  Add peach chunks and boil for about 4 minutes, stirring constantly.  Mash up the peach pieces to make them fairly small, and continue to cook over medium high heat for about 1/2 hour.  You need to stir your mixture the entire time.  The more you stir, the smoother the butter.


You want to reduce your mixture to about half.  It should become darker and very thick.


Spoon the mixture into a hot sterilized 1 cup jar, seal with canning lid, and process in boiling water for about 5 minutes.  I did not bother processing the butter because I only had one jar.  It will simply be kept in the refrigerator.  It should be good for about 6 months. 

This is a very rich butter.  You only need 1 tsp per serving.  It should spread easily and the taste is so strong and sweet that any more than a tsp will be too sweet for some.  Of course, this gourmet flavored peach butter, with tiny chunks of peach won't last for more than a few days, it is soooo good. 


So that leaves us with peels and pits.  On the previous post, I showed a link for peach honey.  Peach honey is made by simmering the peels in water, then letting them stand overnight.  You then remove the juice, add sugar to it, and cook it until it is very thick.  The recipe can be found on Pick Your Own.com.

On my search, I found another recipe that uses peels and pits to make a jelly from.  Back when our parents and grandparents were children, it was common to make jelly from peels and pits.  Nothing was wasted if it could be eaten or used.  In our modern age, we have lost our sense of using everything that we buy.  All of us are guilty of throwing away what we consider the non usable parts.  Well, with a view of looking back and reviving these heirloom recipes, I will take advantage of my discovery and share what I found. 

This next  recipe came from Cooks.com.  Here is the link:  http://www.cooks.com/recipe/5q3r87kx/peach-peel-and-pit-jelly.html

Peach Peel & Pit Jelly


4 qts. peach peels and pits
1 pkg. powdered pectin
3 c. sugar
A word of caution.  Do not use any broken pits.  The best peach for this recipe is a cling variety such as Red Haven.

1 package powdered pectin and 3 cups sugar to each 3 cups juice.Save peels and pits of peaches when canning. Barely cover them with water in a large kettle. Bring to a boil and simmer for 30 minutes. Let stand overnight.
Strain juice through cheesecloth. Measure 3 cups juice into a large pan. Add 1 package pectin. Bring to vigorous boil.
Add 3 cups sugar and boil rapidly until it reaches "sheeting off" jelly test, 220 degrees. Skim off foam. Pour into hot jelly jars and seal.

Cooking Tip;  Don't squeeze the juice out of the cheesecloth bag.  Once you have strained the bulk of the juice, get another bowl and hang the cheesecloth bag over it.  Let it continue to drip for an additional 8 hours.  This will give you about another cup of very peachy juice.  It is okay if you don't make jelly right away.  Keep juice in closed container but use within a day after your final straining.


Tomorrow I will be picking a large amount of freestone peaches.  The freestone kind allow you to quickly remove the peach from the pit, because it isn't really attached.  I have heard that this kind of peach, though easy to work with for canning peach slices, isn't as sweet as the stoned variety.  Since the peaches will be floating in a medium syrup, I can probably not feel guilty about picking the freestone kind.  It will make my life a bit easier as I try to put up about 8 quarts of canned peaches.   

August 17' 2014
I have made my first batch of this jelly, and it is absolutely delicious.  I will be picking more peaches this week and look forward to making this recipe again,  it will make excellent Christmas gifts as well as work well in Thumbprint cookies or in peach filled danish.  Watch the blog for winter recipes that use the jelly for more than just a spread on toast.

Happy picking.  Next is apples.

Wednesday, August 6, 2014

Canning Peaches

     It is peach picking time in Connecticut.  My husband has requested I can peaches because he loves eating the Del Monte brand.  I immediately went to search mode to find instructions on how to do it and was surprised to see I can use a hot water canning process instead of a pressure canner.
      As a home canner I should have a pressure canner, but I never did invest in one.  So after finding out I can do a hot water process, it looks like I will be canning peaches this year.
     These instructions came right off of a website.  I have not applied any of these techniques yet, so for me they are untried.  Here is the instructions from Pick Your Own.com.

How to Make Homemade Canned Peaches, Plums, Pears, Plums, Nectarines and Cherries

You think making and canning your own peaches, pears, plums, cherries or nectarines is difficult or expensive?  Not at all!  Here's how to do it, complete instructions in easy steps and completely illustrated. In the winter when you open a jar, the peaches will taste MUCH better than anything you've ever had from a store, and by selecting the right fruit, it will use less sugar than store-bought canned peaches. Peaches, pears, plums, cherries or nectarines can be packed in very light, light or medium sugar syrup. They can also be packed in water, apple juice or white grape juice.
Prepared this way, the jars have a shelf life of about 12 to 18 months, and aside from storing in a cool, dark place, require no special attention. If you'd rather freeze your fruit, see 

my page on how to freeze peaches, plums, nectarines, figs and cherries. Even easier than canning and they will taste just like fresh.. but it does take up space in the freezer. You may want to make make your own home canned peach pie filling to use in the winter, too.


Directions for Making Canned Peaches, Apricots, Pears, Pluots, Plums, Cherries or Nectarines

Ingredients

  • Fruit (see step 1)
  • Sugar (or fruit juice, or Stevia ; or if you prefer, Splenda), or just water!)

Equipment

  • 1 Water Bath Canner (a huge pot with a lifting rack to sanitize the jars of peaches after filling (about $30 to $35 at mall kitchen stores and local "big box" stores, but it's usually cheaper online from our affiliates) You CAN use a large pot instead, but the canners are deeper, and have a rack top make lifting the jars out easier. If you plan on canning every year, they're worth the investment.;
    OR
    a pressure canner
    You can use either with this recipe.  The processing times for each are given in the recipe.
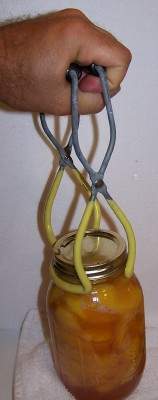
  • Jar grabber (to pick up the hot jars)
  • Lid lifter (has a magnet to pick the lids out of the boiling water where you sanitize them. ($2 at mall kitchen stores and local "big box" stores, but it's usually cheaper online from our affiliates)
  • Jar funnel ($2 at mall kitchen stores and local "big box" stores, but it's usually cheaper online from our affiliates)
  • At least 1 large pot
  • Large spoons and ladles
  • Ball jars (Publix, Kroger, other grocery stores and some "big box" stores carry them - about $8 per dozen quart jars including the lids and rings)

Recipe and Directions

Step 1 - Selecting the peaches, apricots, pluots, plums, cherries or nectarines

The most important step!  You need peaches that are sweet, and to make the work easier, cling-free (also called freestone).  This means that the peach separates easily from the pit!  Same with nectarines, and this doesn't apply to cherries or plums. Don't miss the peach picking tips page!

Choose ripe, mature fruit of ideal quality for eating fresh or cooking. They should not be mushy, but they also should not be rock hard: just as ripe as you would eat them fresh.
After this step, I'll just refer to "peaches" but it applies to plums, pears, cherries and nectarines.

Step 2 - How many peaches and where to get them

You can pick your own, or buy them at the grocery store.  But for large quantities, you'll find that real* farmer's markets, like the Farmer's Market in Forest Park, Georgia have them at the best prices. 
It takes about 5 good sizes peaches or nectarines (or about 10 plums) to fill one quart jar. An average of 17½ pounds is needed per canner load of 7 quarts; an average of 11 pounds is needed per canner load of 9 pints. A bushel weighs 48 pounds and yields 16 to 24 quarts — an average of 2½ pounds per quart.
* - not the cutesy, fake farmer's markets that are just warehouse grocery stores that call themselves farmer's markets.

Step 3 - Prepare the sugar (or other sweetener) solution

Peaches must be packed in a solution of water and sugar or fruit juice.  It's up to you which to use.  Sugar is added to improve flavor, help stabilize color, and retain the shape of the fruit. It is not added as a preservative. Sugar solution is much less expensive (unless you have a supply of cheap grape juice), so I usually use a light solution to keep sugar (and the added calories) to a minimum.

Sugar Syrup
SyrupSugarWaterYield
Light2 cups6 cups7 cups
Medium3 cups6 cups6 1/2 cups
Heavy4 cups6 cups7 cups


NOTE: you can ALSO use fruit juice (if you want a natural alternative) or water or artificial sweetener (Stevia (or if you prefer, Splenda), but NOT Nutrasweet; if you want a low calorie alternative).  Click here for instruction about how to prepare these sugarless, fruit juice, or Stevia (or if you prefer, Splenda) solutions!

To prepare syrup, while heating water, add sugar slowly, stirring constantly to dissolve. Bring to a gentle boil and keep it simmering. After preparing the liquid syrup, keep it hot (but not boiling).
How much solution to make?  That is hard to say.  Everyone packs the peaches in the jars a bit differently and that obviously and directly affects the amount of solution needed.  You can store any unused solution in the fridge or freezer, and boil it again for use in the next batch.

Step 4 - Wash the jars and lids

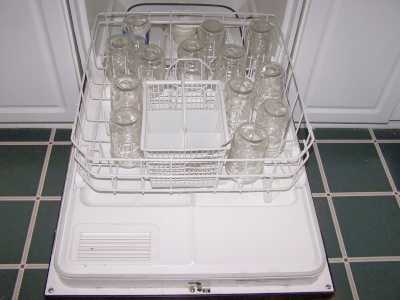
This is a good time to get the jars ready! The dishwasher is fine for the jars; especially if it has a "sanitize" cycle. Otherwise put the jars in boiling water for 10 minutes. I just put the lids in a small pot of almost boiling water for 5 minutes, and use the magnetic "lid lifter wand" (available from target, other big box stores, and often grocery stores; and available online - see this page) to pull them out.


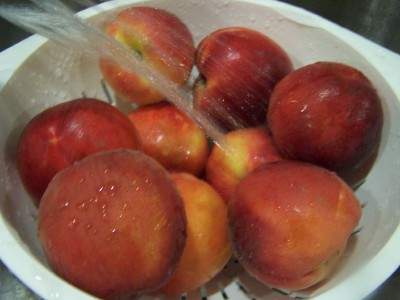
Step 5 -Wash the peaches!

I'm sure you can figure out how to wash the peaches in plain cold or lukewarm water


Step 6 - Peeling the Peaches


Nope, we're not going to peel them by hand; that's way too much work.  Instead, here's a great trick that works with many fruits and vegetables with skins (like tomatoes): just dip the fruit in boiling water for 20 to 45 seconds.
NOTE: this works GREAT on ripe peaches, but if the beaches are rock hard, not so well. Best to let the peaches soften for a day or two first!
Remove from the boiling water using a slotted spoon and put into a large bowl or pot of cold water and ice for several minutes


The skins will easily slide off now! 

Nectarines do not need to be peeled, if you don't mind the skins. Neither do peaches, but most people prefer them with skins off - they tend to be slimy after all this.
SAVE THE PEELINGS in the fridge - to make peach honey!

Note: one visitor reports she has good success using a potato peeler on unblanched peaches.

Step 7 - Cut up the peaches

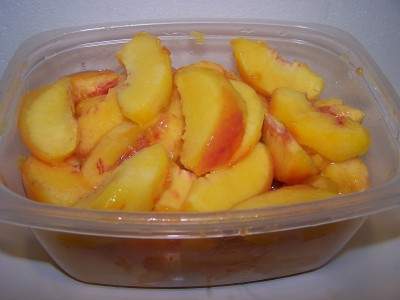
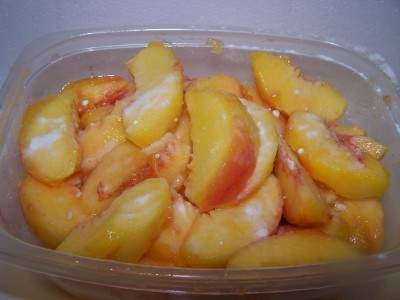
Cut out any brown spots and mushy areas. Cut the peaches in half, or quarters or slices, as you prefer! Remove pits!


Step 8 - Prevent the fruit from darkening!

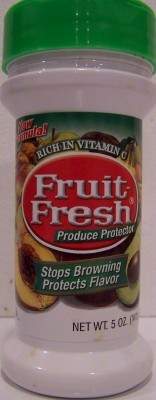
Peaches will turn brown when exposed to air, even air in a sealed, sterile jar. To keep the fruit from turning brown, when you get a bowlful, sprinkle 1/4 cup lemon juice or Fruit-Fresh (which is just a mix of citric acid and vitamin C, perfectly natural).  Then stir the peaches to make sure all the surfaces have been coated.


Step 9 - For a Hot Pack

Hot packing is recommended for all fruits because it is a bit safer and makes fruit easier to pack in jars. Hot packed peaches are also less likely to float than peaches canned by the raw-pack method. Just put the cut peaches into the barely boiling syrup solution for 5 minutes. (If you want to use the "cold pack" or "raw pack" method, just skip this step!)

Hot packing also helps top reduce air entrapment (bubbles) as the cell structure of peaches tends to retain air; which is released during the heating prior to the jars being filled.  Hot packing also tends to produce brighter colors.

Step 10 - Fill the jars

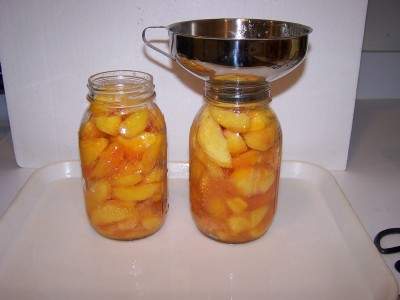
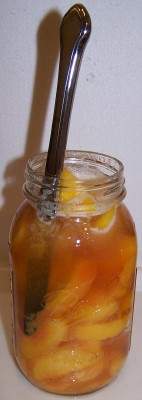
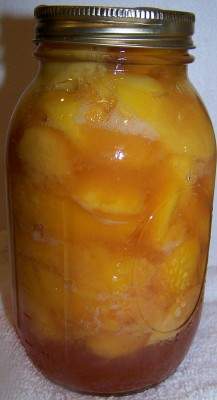
Pack the peaches into sanitized jars (leaving 1/2 to 1 inch space at the top) and cover with boiling sugar syrup leaving 1/2 inch head space. (if you don't cook or heat the peaches first, this is called "cold packing"). Run a rubber spatula or table knife gently between peaches and jar to release trapped air bubbles. To do this more effectively, tilt the jar slightly while running the tool between the fruit and the edge of the jar and also pressing inward against the fruit a few times.

After packing the peaches in the jar, pour the sugar solution up to 1/2 inch (1 cm) from the top.  the fruit should be covered completely. If you have problems with fruit darkening (turning brown) later, then sprinkle 1/2 teaspoon of FruitFresh or ascorbic acid into the top of the jar before you seal it.
Wipe rim and screw threads with a clean damp cloth. Add lid, screw band and tighten firmly and evenly. Do not over tighten. 

Tips!

Canned fruits often will float if the sugar syrup is too heavy, if jars are packed too loosely or if air remains in the tissues of the fruit after processing. To avoid this use a light or medium sugar syrup, make sure fruit is firm and ripe and pack fruit tightly in jars without crushing.

If fruit is not covered by liquid it may darken during storage (but does not necessarily mean it is spoiled, as all fruits will darken somewhat). To avoid this be sure fruit is covered by removing air bubbles from jars liquid while still leaving the recommended head space. Also be sure to remove trapped air bubbles as described earlier. 

Peaches, pears and apples may also show a blue, red or pink color change after canning. This is the result of natural chemical changes that sometimes occur as fruits are heated. It is harmless and won't affect flavor!

Also, avoid storing canned food near heat sources such as a furnace, water heater, hot water or sunny areas. Jars need to be kept cool and dark for longer storage life and to protect against spoilage. Be sure to store in a dry place. If the lid or band rusts, that can cause the seal to break.


Step 11 - Process the jars in the water bath (or pressure canner - see the table)

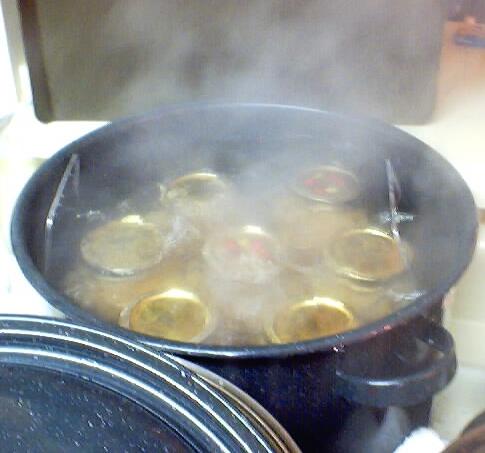
Put the sealed jars in the canner and keep them cover with at least 1 inch of water and boiling. In general, if you are at sea level, boil them for at least 20 minutes (and no more than 30 min).

Here are more specific guidelines from the USDA for canning peaches in a boiling-water canner.

If you have a pressure canner; either a dial or a weighted-gauge canner, you can use that.  The times for pressure canners are given below, also.


Table 1. Recommended process time for Peaches, halved or sliced
in a boiling-water canner.
–
Process Time at Altitudes of
Style of PackJar Size0 - 1,000 ft1,001 - 3,000 ft3,001 - 6,000 ftAbove 6,000 ft
Hot
 
Pints
Quarts
20 min
25
25
30
30
35
35
40
Raw
 
Pints
Quarts
25
30
30
35
35
40
40
45

Table 2. Process Times for Peaches (Halved or Sliced)
in a Dial-Gauge Pressure Canner.
Canner Pressure (PSI) at Altitudes of
Style of PackJar SizeProcess Time (Min)0 - 2,000 ft2,001 - 4,000 ft4,001 - 6,000 ft6,001 - 8,000 ft
Hot and
Raw
Pints or
Quarts
106789

Table 3. Process Times for Peaches (Halved or Sliced)
in a Weighted-Gauge Pressure Canner.
Canner Pressure (PSI) at Altitudes of
Style of PackJar SizeProcess Time (Min)0 - 1,000 ftAbove 1,000 ft
Hot and
Raw
Pints or
Quarts
10510

Step 12 - Remove and cool

Lift the jars out of the water and let them cool without touching or bumping them in a draft-free place (usually takes overnight), here they won't be bumped. You can the

n remove the rings if you like, but if you leave them on, at least loosen them quite a bit, so they don't rust in place due to trapped moisture.

Once the jars are cool, you can check that they are sealed verifying that the lid has been sucked down. Just press in the center, gently, with your finger.
If it pops up and down (often making a popping sound), it is not sealed. If you put the jar in the refrigerator right away, you can still use it. Some people replace the lid (with a new lid) and reprocess the jar, while it’s still hot for the full time in the canner – that’s acceptable!


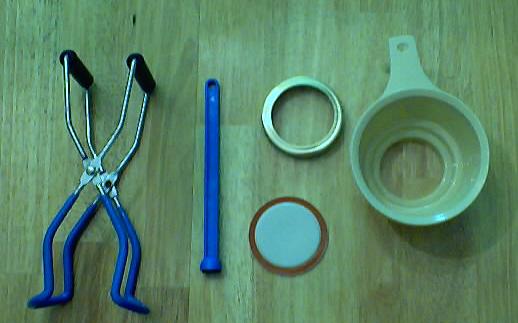
Other Equipment:

From left to right:
  1. Jar lifting tongs 
            helpful to pick up hot jars
  2. Lid lifter 
            - to remove lids from the pot 
            of hot water 
  3. Lid 
           - disposable - you may only 
           use them once
  4. Ring 
          - holds the lids on the jar until after
          the jars cool - then you don't need them
  5. Canning jar funnel
          - to fill the jars

Frequently asked questions!

  1. Is it safe to can unpeeled peaches? I've spent hours on websites and read several books on canning - to no avail. This is the second year I've canned unpeeled peaches in a 5 to 1 water to sugar syrup (we're still alive). All my friends, their mothers and everything I've read says to peel and I'm beginning to buckle under all the finger wagging!!!   
    Answer: Buckle not! It is perfectly safe to can peaches with the skins on!  Most people don't because some folks think it feels like they're swallowing a cat (short hair, not Persian) when they eat a peach with the fuzzy skin still on! :)  But it is perfectly safe! (canning unskinned peaches, not cats, that is!  :) ..I'm gonna get letters on this one, for sure...
  2. I just canned peaches for the first time. The seal seams good but I have air bubbles in my jars. Is this OK?"
    Answer: Yes, that’s common. Some of the air came from bubbles trapped between the pieces of fruit you put in the jar.  Other bubbles came from air trapped within the fruit itself.  As long as the jar was processed according to the directions and it sealed properly, it is perfectly safe to eat!

Sunday, July 27, 2014

Overzealous Zucchini


It is the middle of summer, and those who have planted a few hills of zucchini summer squash are just about up to their ears in this prolific producer.  There are various types of zucchini, including a yellow zucchini which is sweeter than the green, but has the classic zucchini texture.  There can be no doubt it is a zucchini.

There are many ways to prepare zucchini, but a very easy way is grilled.  This recipe was given to me by my friend Nadine.  It works either grilled or baked.  It maintains a crispy crunch, because you don't precook the squash.  Here is the down and dirty easy way to cook some of that very large zucchini that you missed while you were picking, and you think you just can't use it because it is too large.  Not so.  It is absolutely delicious prepared this way. 

1.)  Slice zucchini lengthwise in about 1/3 inch thick slabs.
2.)   Brush with olive oil.
3.)  Sprinkle liberally with garlic powder and smoked paprika.
             (A word about smoked paprika/  It is
             a spice I just was recently introduced to.  It lends a nice barbecue flavor to anything you     
             shake it on. It is available where you find your everyday spices in the grocery
             store.)
4.)  Place on grill on a foil pan with holes poked in.  I use a large round pizza pan with v,ery large
       round holes all over it.  Barbecue for about 5-7 minutes on each side.
5.)  At the very last, put your favorite grated cheese on the zucchini and cook until just melted.  I used
      three cheeses, parmesan, fresh mozzarella, and asiago. 

If  baking, place cheeses on zucchini before baking.  Bake at 400 degrees for about 20 minutes.

-----------------------------------------------------------------------------------------------------------------------

If you missed these recipe, these next two come from Yankee Magazine, summer 2014.  You can sign up for their monthly newsletter which drops seasonal recipes into your email.  It is well worth signing up.


Italian Zucchini Crescent Pie


Yield: 6 to 8 servings
Who can ever have enough recipes for zucchini? This one for Italian Zucchini Crescent Pie is easy, delicious, and highly recommended.

Learn more and see how to make Italian Zucchini Crescent Pie.

Italian Zucchini Crescent Pie
Photo/Art by Aimee Seavey

Ingredients:

  • 3 tablespoons margarine or butter
  • 4 cups thinly sliced zucchini
  • 1 cup chopped onion
  • 1/2 cup chopped fresh parsley or 2 tablespoons dried
  • 1/2 teaspoon salt
  • 1/2 teaspoon pepper
  • 1/4 teaspoon garlic powder
  • 1/4 teaspoon dried basil
  • 1/4 teaspoon dried oregano
  • 2 eggs, beaten
  • 8 ounces mozzarella cheese, shredded (2 cups)
  • 1 can (8 ounces) crescent dinner rolls
  • 2 teaspoons prepared mustard

Instructions:

NOTE. Before you begin, it's best to place the zucchini slices in a colander over the sink or a large bowl. Shake a little salt over the zucchini, then toss a few times in the colander to coat. Allow the zucchini to drain for an hour before proceeding. This will remove excess moisture from the zucchini and give you a better result in the final dish.

Preheat the oven to 375 degrees F. In a large skillet, melt the butter over medium heat. Add the zucchini and onion and saute until the onion is golden, about 10 minutes. Remove from the heat.

Stir in the parsley, salt, pepper, garlic powder, basil, and oregano. Combine the eggs and mozzarella and stir into the zucchini mixture.

Place the crescent roll dough into an ungreased 10-inch pie plate. Press over the bottom and up the sides to form a crust. Spread the crust with the mustard. Pour the vegetable mixture into the crust. Bake for 18 to 20 minutes or until the center is set. If the crust begins to brown before the center is
set, cover with aluminum foil.

Let stand for 10 minutes before serving.


-------------------------------------------------------------------------------------------------------------------------


Lemon Blueberry Zucchini Bread


Ingredients:

  • 4 eggs
  • 2 cups (or less) sugar
  • 1 cup canola oil
  • 2 cups unpeeled, coarsely grated zucchini, drained slightly
  • zest of 1 lemon, grated
  • juice of 1 lemon
  • 3-1/2 cups unbleached flour
  • 1 teaspoon salt
  • 1-1/2 teaspoons baking soda
  • 4 teaspoons baking powder
  • 1 cup (or more) frozen Maine wild blueberries

Instructions:

Preheat the oven to 350 degrees F. Beat the eggs. Add the sugar and beat until well mixed. Add the oil and beat. Add the zucchini, lemon juice, and lemon zest and mix well.

In a separate bowl combine the flour, salt, soda, and baking powder and add to the wet ingredients, mixing well. Gently fold in the blueberries. Pour the batter into 2 greased and floured 5x9-inch loaf pans. Bake approximately 55 minutes or until a knife inserted into the center of one of the loaves comes out clean. Remove from the oven and cool 10 minutes, then remove the loaves to a wire rack to continue cooling.

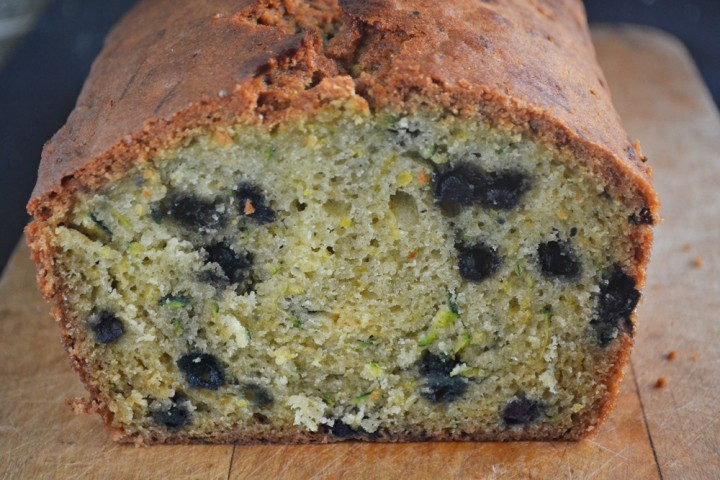
With summer in full swing, it won’t be long before gardens are overflowing and we find ourselves frantically trying to keep up with an overload of delicious in-season fruits and vegetables. This recipe for Lemon Blueberry Zucchini bread was part of a Yankee New England B&B recipe collection, and comes from the 1794 Watchtide…by the Sea! Inn in Searsport, Maine. We love it because it makes terrific use of summer’s bountiful zucchini, wild Maine blueberries, and tart lemon. Why settle for plain zucchini or blueberry bread when you could combine the two, plus a dose of citrus, and get something even more special?
zucchini lemon blueberry bread
Photo/Art by Aimee Seavey
Make the most of summer’s bounty with Lemon Blueberry Zucchini Bread.
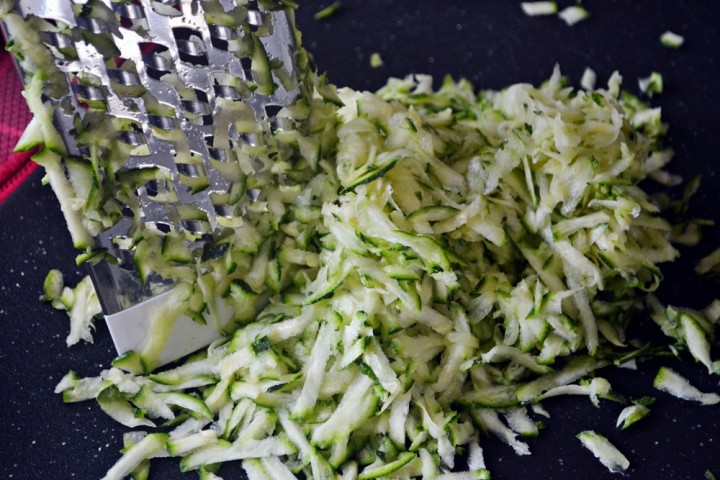
Zucchini is a summer kitchen staple. Among other things, you can slice it up for use in a stir-fry or kabobs, hollow it out and bake it stuffed with tomatoes and cheese, or shred it for use in zucchini fritters or baked goods like muffins, cakes, and quick-breads. When shredding, I like to use my box grater with the largest holes so I’ll get to see plenty of the zucchini in the final product.
shredded zucchini
Photo/Art by Aimee Seavey
Freshly shredded zucchini.
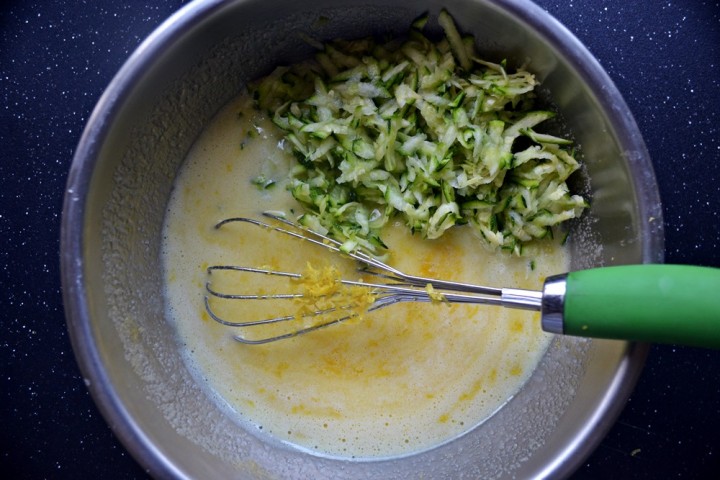
Here, shredded zucchini is whisked together with eggs, sugar, oil, fresh lemon juice, and lemon zest.
zucchini bread batter
Photo/Art by Aimee Seavey
Combining the zucchini and lemon goodness.
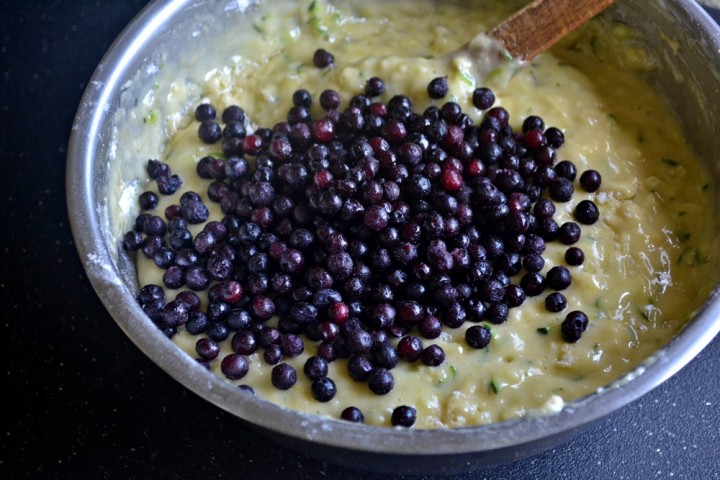
Then, after the dry ingredients are incorporated, a healthy dose of wild Maine blueberries completes the batter. If you can’t get your hands on any fresh blueberries, the frozen variety works fine. Just be sure to add them while they’re still frozen and don’t stir the batter too much. Over-stirring when using frozen blueberries can cause the berries to “bleed,” giving you purple batter, which will visually drown out the beautiful flecks of green and yellow from the zucchini and lemon zest.
blueberry batter
Photo/Art by Aimee Seavey
Time for tiny, wild blueberries from Maine.
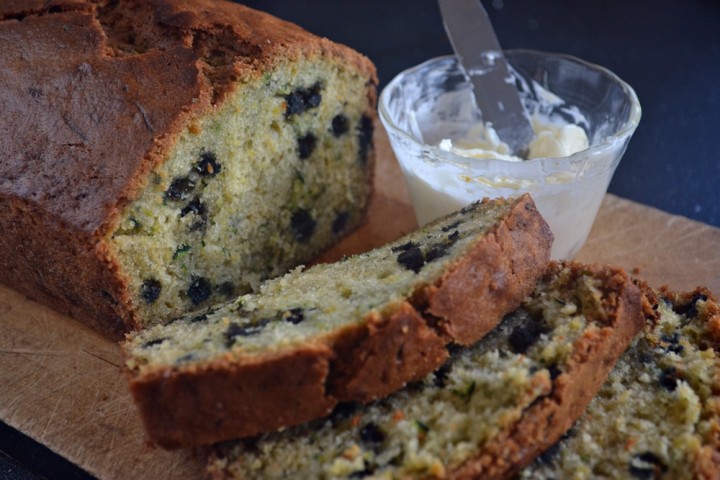
Because my loaf pan is a little larger than most, I made one loaf and a half-dozen muffins with my batter. Look at all those beautiful berries and bits of zucchini and lemon!
zucchini blueberry lemon bread
Photo/Art by Aimee Seavey
Tart and sweet, this bread’s a winner!
While it’s sweet enough to eat on its own, a warm slice topped with a little butter is summer quick-bread perfection, and since this recipe makes enough to share, you can either give the extra loaf to a friend, or freeze it for later.

Aimee Seavey

Author:

Aimee Seavey

Biography:

Assistant Editor Aimee Seavey is a staff writer for Yankee Magazine and assists in the development and promotion of content for YankeeMagazine.com through blogging and social media outlets.
-----------------------------------------------------------------------------------------------------------------------


That is all for now.  I haven't tried the lemon blueberry zucchini bread yet, but at my next picking I intend to make a few loaves and freeze a few.  It sounds scrumptious.  I'll let you know how it came out.  Happy squashing.